> ## Documentation Index
> Fetch the complete documentation index at: https://docs.firmable.com/llms.txt
> Use this file to discover all available pages before exploring further.
# Microsoft 365 Copilot
> Add Firmable to Microsoft Copilot Studio as a custom connector
Firmable connects to Microsoft Copilot Studio as a **Power Platform custom connector**. You create it
once in Power Apps, and it's then available to every agent in that environment.
**Before you start**
* Access to [Power Apps](https://make.powerapps.com), and permission to create custom connectors
* The Firmable **OpenAPI file**, your **Client ID** and a **Client Secret** — use **Support** at
the top of this page and we'll send them over
## Step 1: Create the connector
Open [**Custom connectors**](https://make.powerapps.com/customconnectors) in Power Apps.
**Custom connectors** isn't in the left menu by default. It's under **More** → **Discover all**, in
the **Data** group. Pin it while you're there.
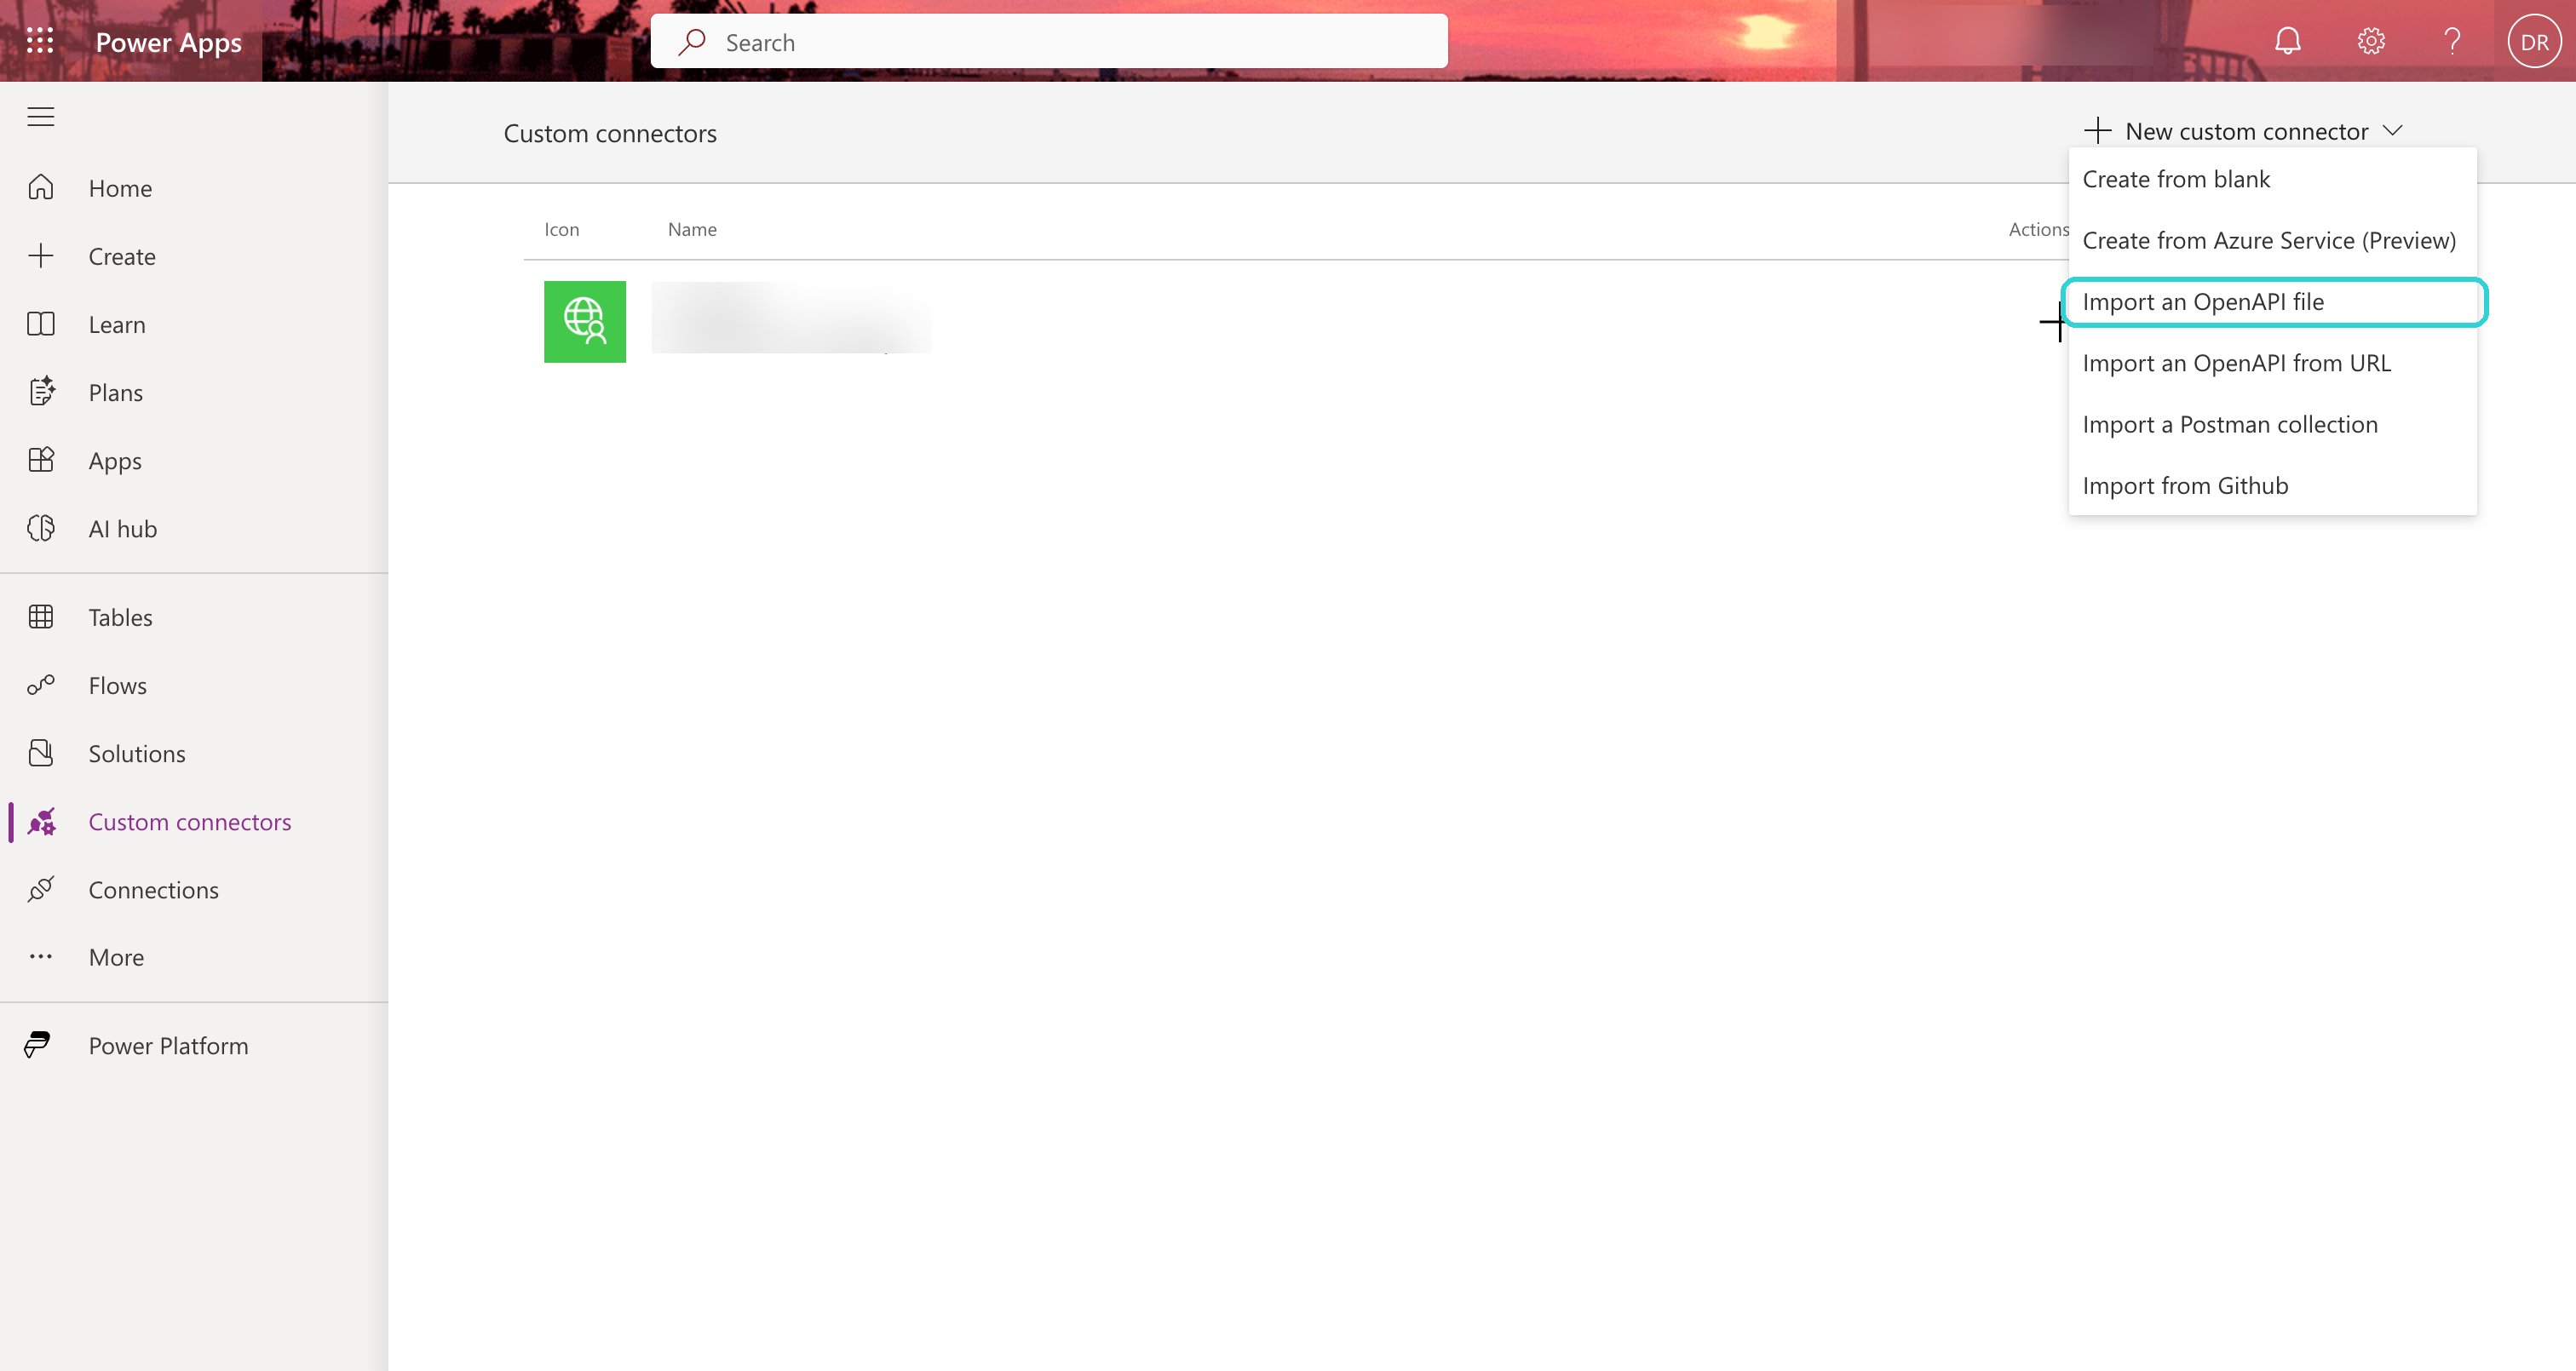
Click **New custom connector** → **Import an OpenAPI file**.
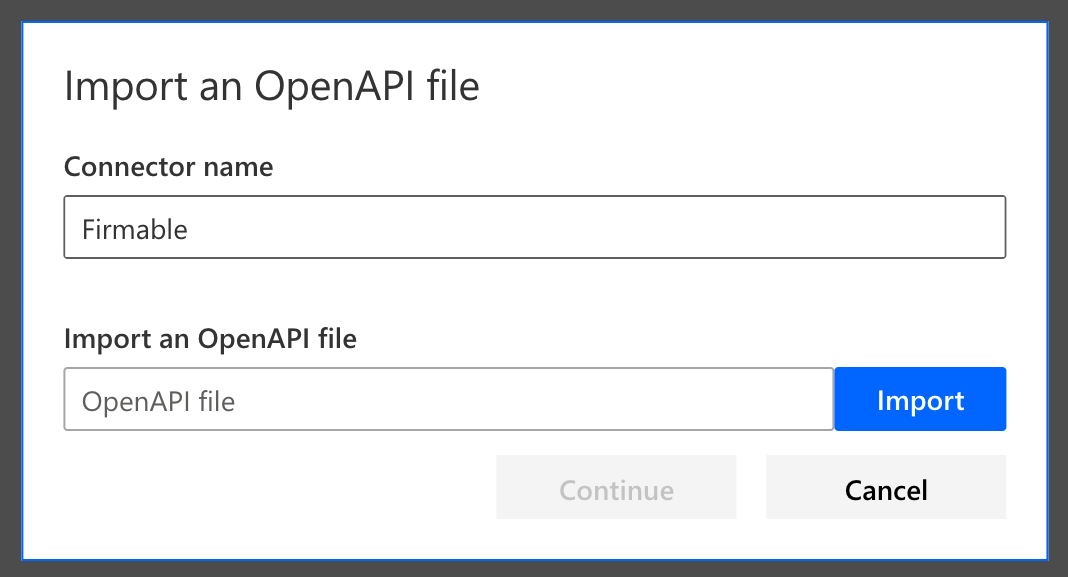
 Give the connector a name, then click **Import** and pick the OpenAPI file we sent you.
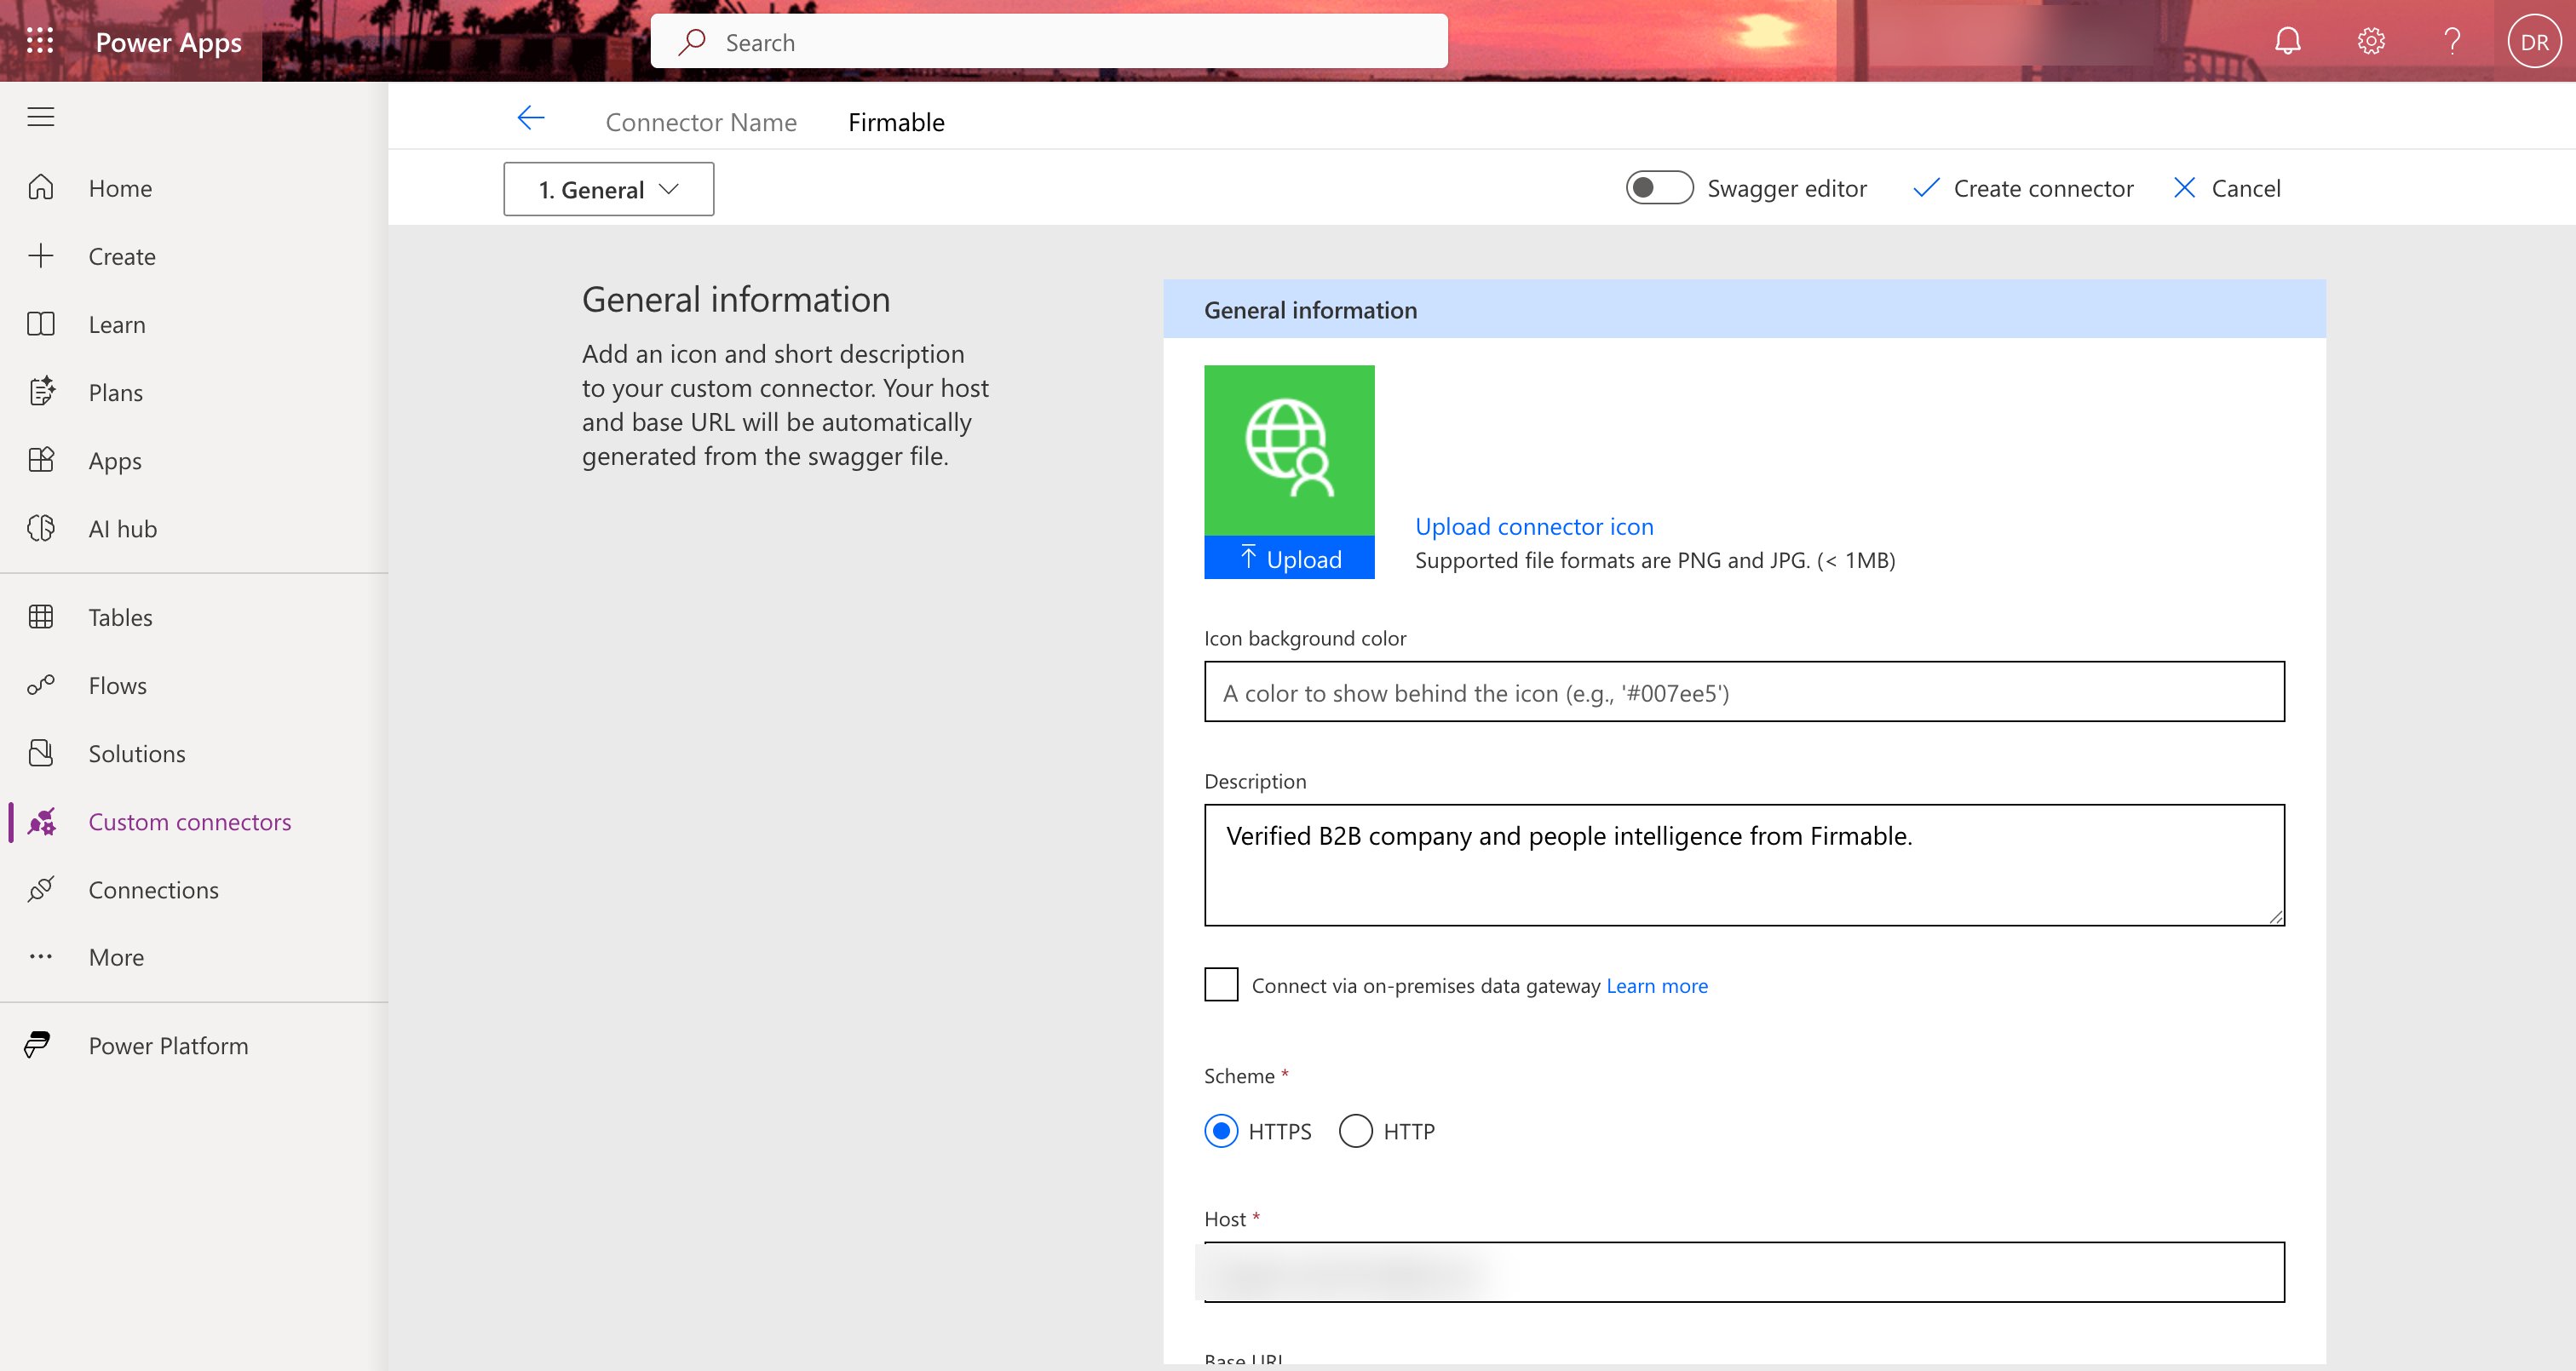
 Click **Continue**. The server URL and connector details come from the file, so there's nothing to
fill in on the **General** page.
Click **Continue**. The server URL and connector details come from the file, so there's nothing to
fill in on the **General** page.
 ## Step 2: Set up authentication
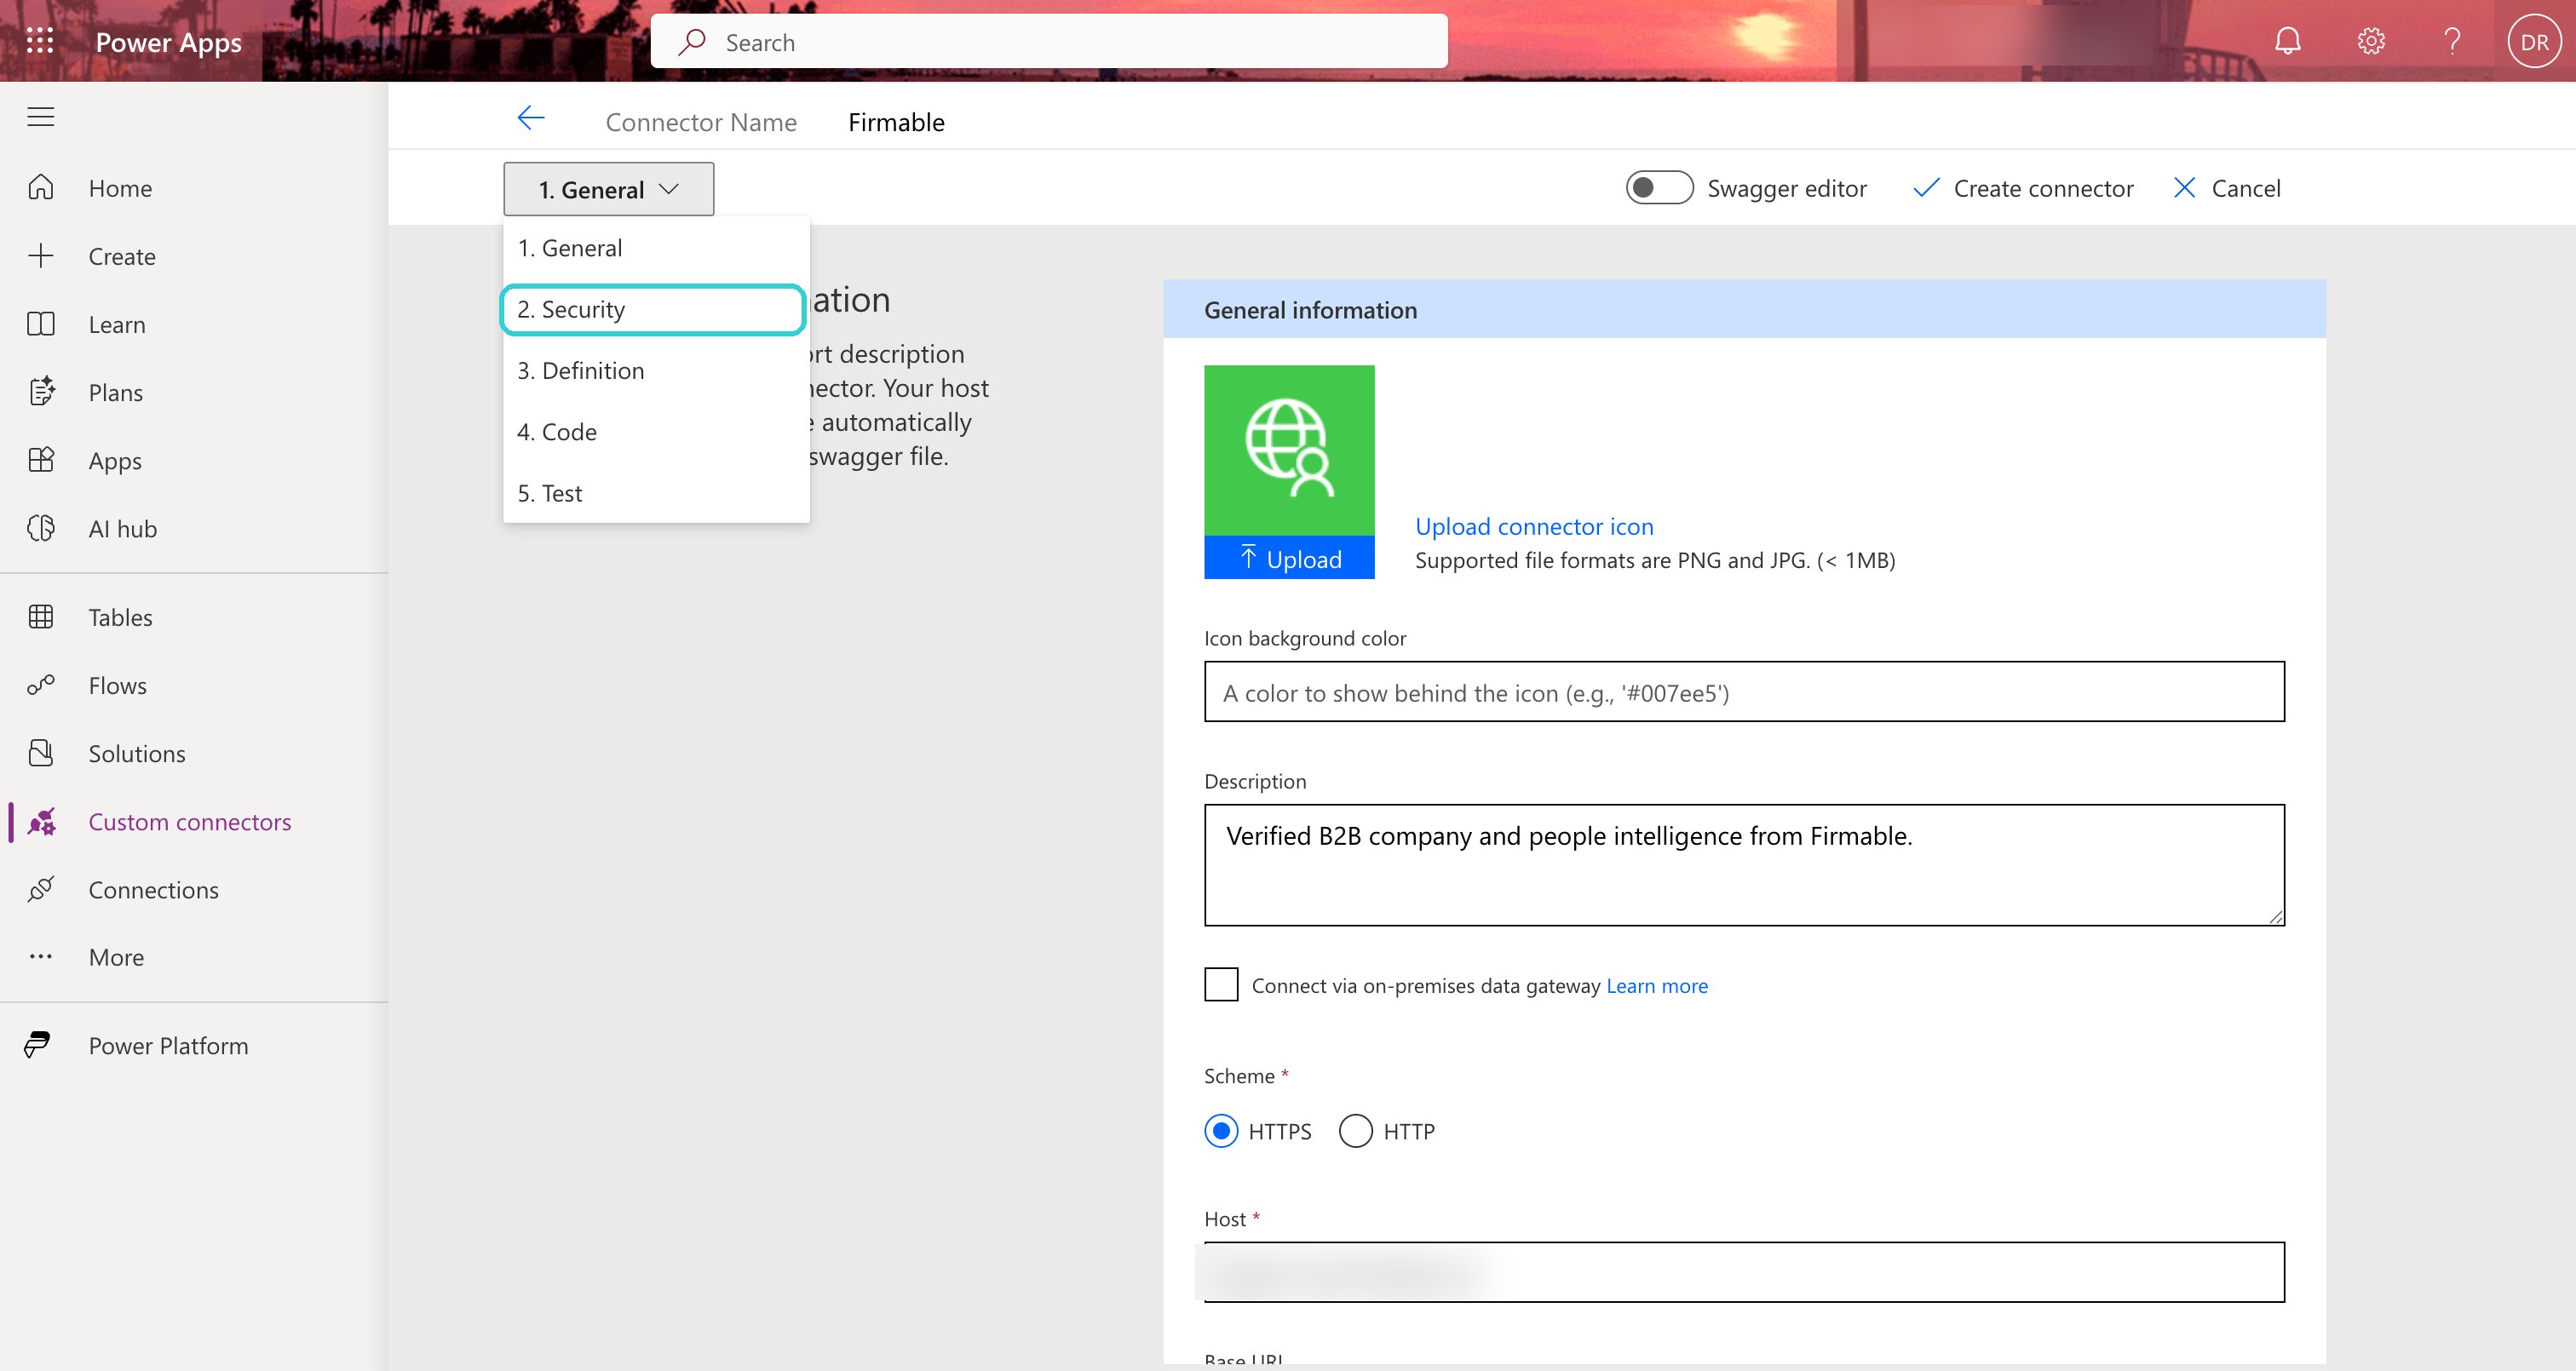
Switch to **2. Security** using the step dropdown at the top left.
## Step 2: Set up authentication
Switch to **2. Security** using the step dropdown at the top left.
 **Authentication type**, **Identity Provider**, **Authorization URL** and **Token URL** are already
filled in from the file.
**Authentication type**, **Identity Provider**, **Authorization URL** and **Token URL** are already
filled in from the file.
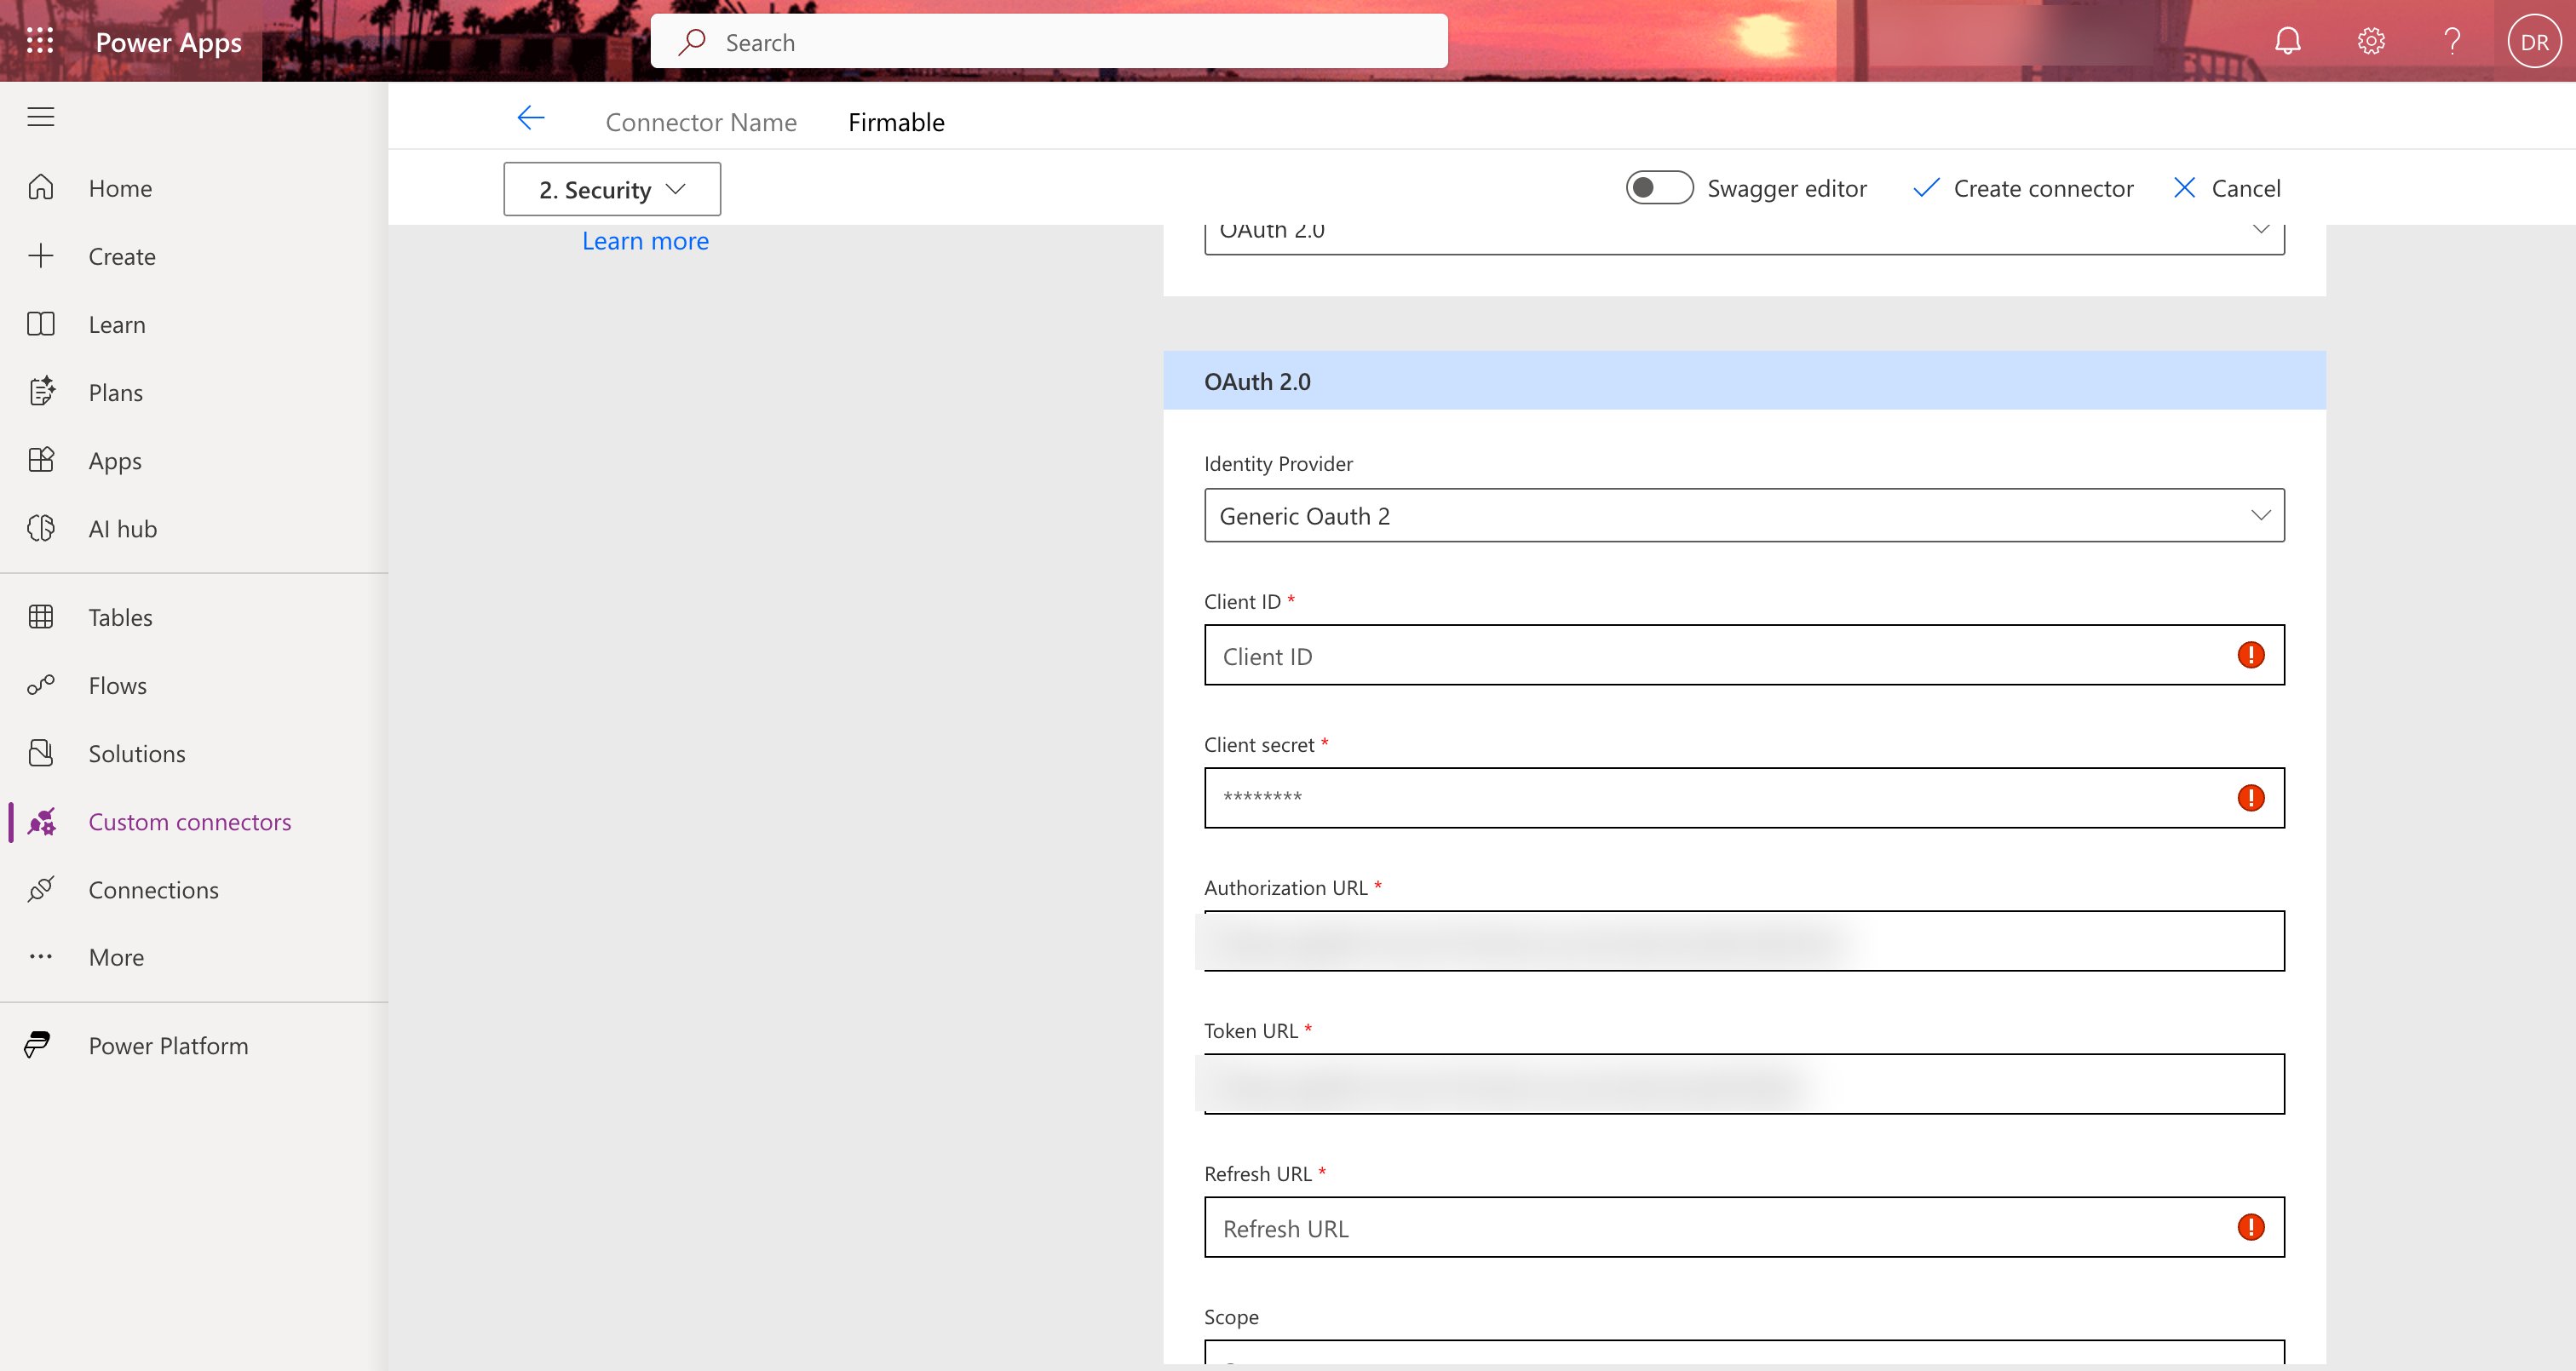 Three fields are left:
| Field | What to enter |
| ----------------- | ----------------------------------------- |
| **Client ID** | From the email we sent you |
| **Client secret** | From the email we sent you |
| **Refresh URL** | The same value as the **Token URL** above |
Leave **Scope** empty, then click **Create connector**.
## Step 3: Send us your Redirect URL
Don't skip this step — sign-in won't work until we've allow-listed your Redirect URL.
Power Apps generates a **Redirect URL** that's unique to your connector, and it only appears after
you've saved for the first time.
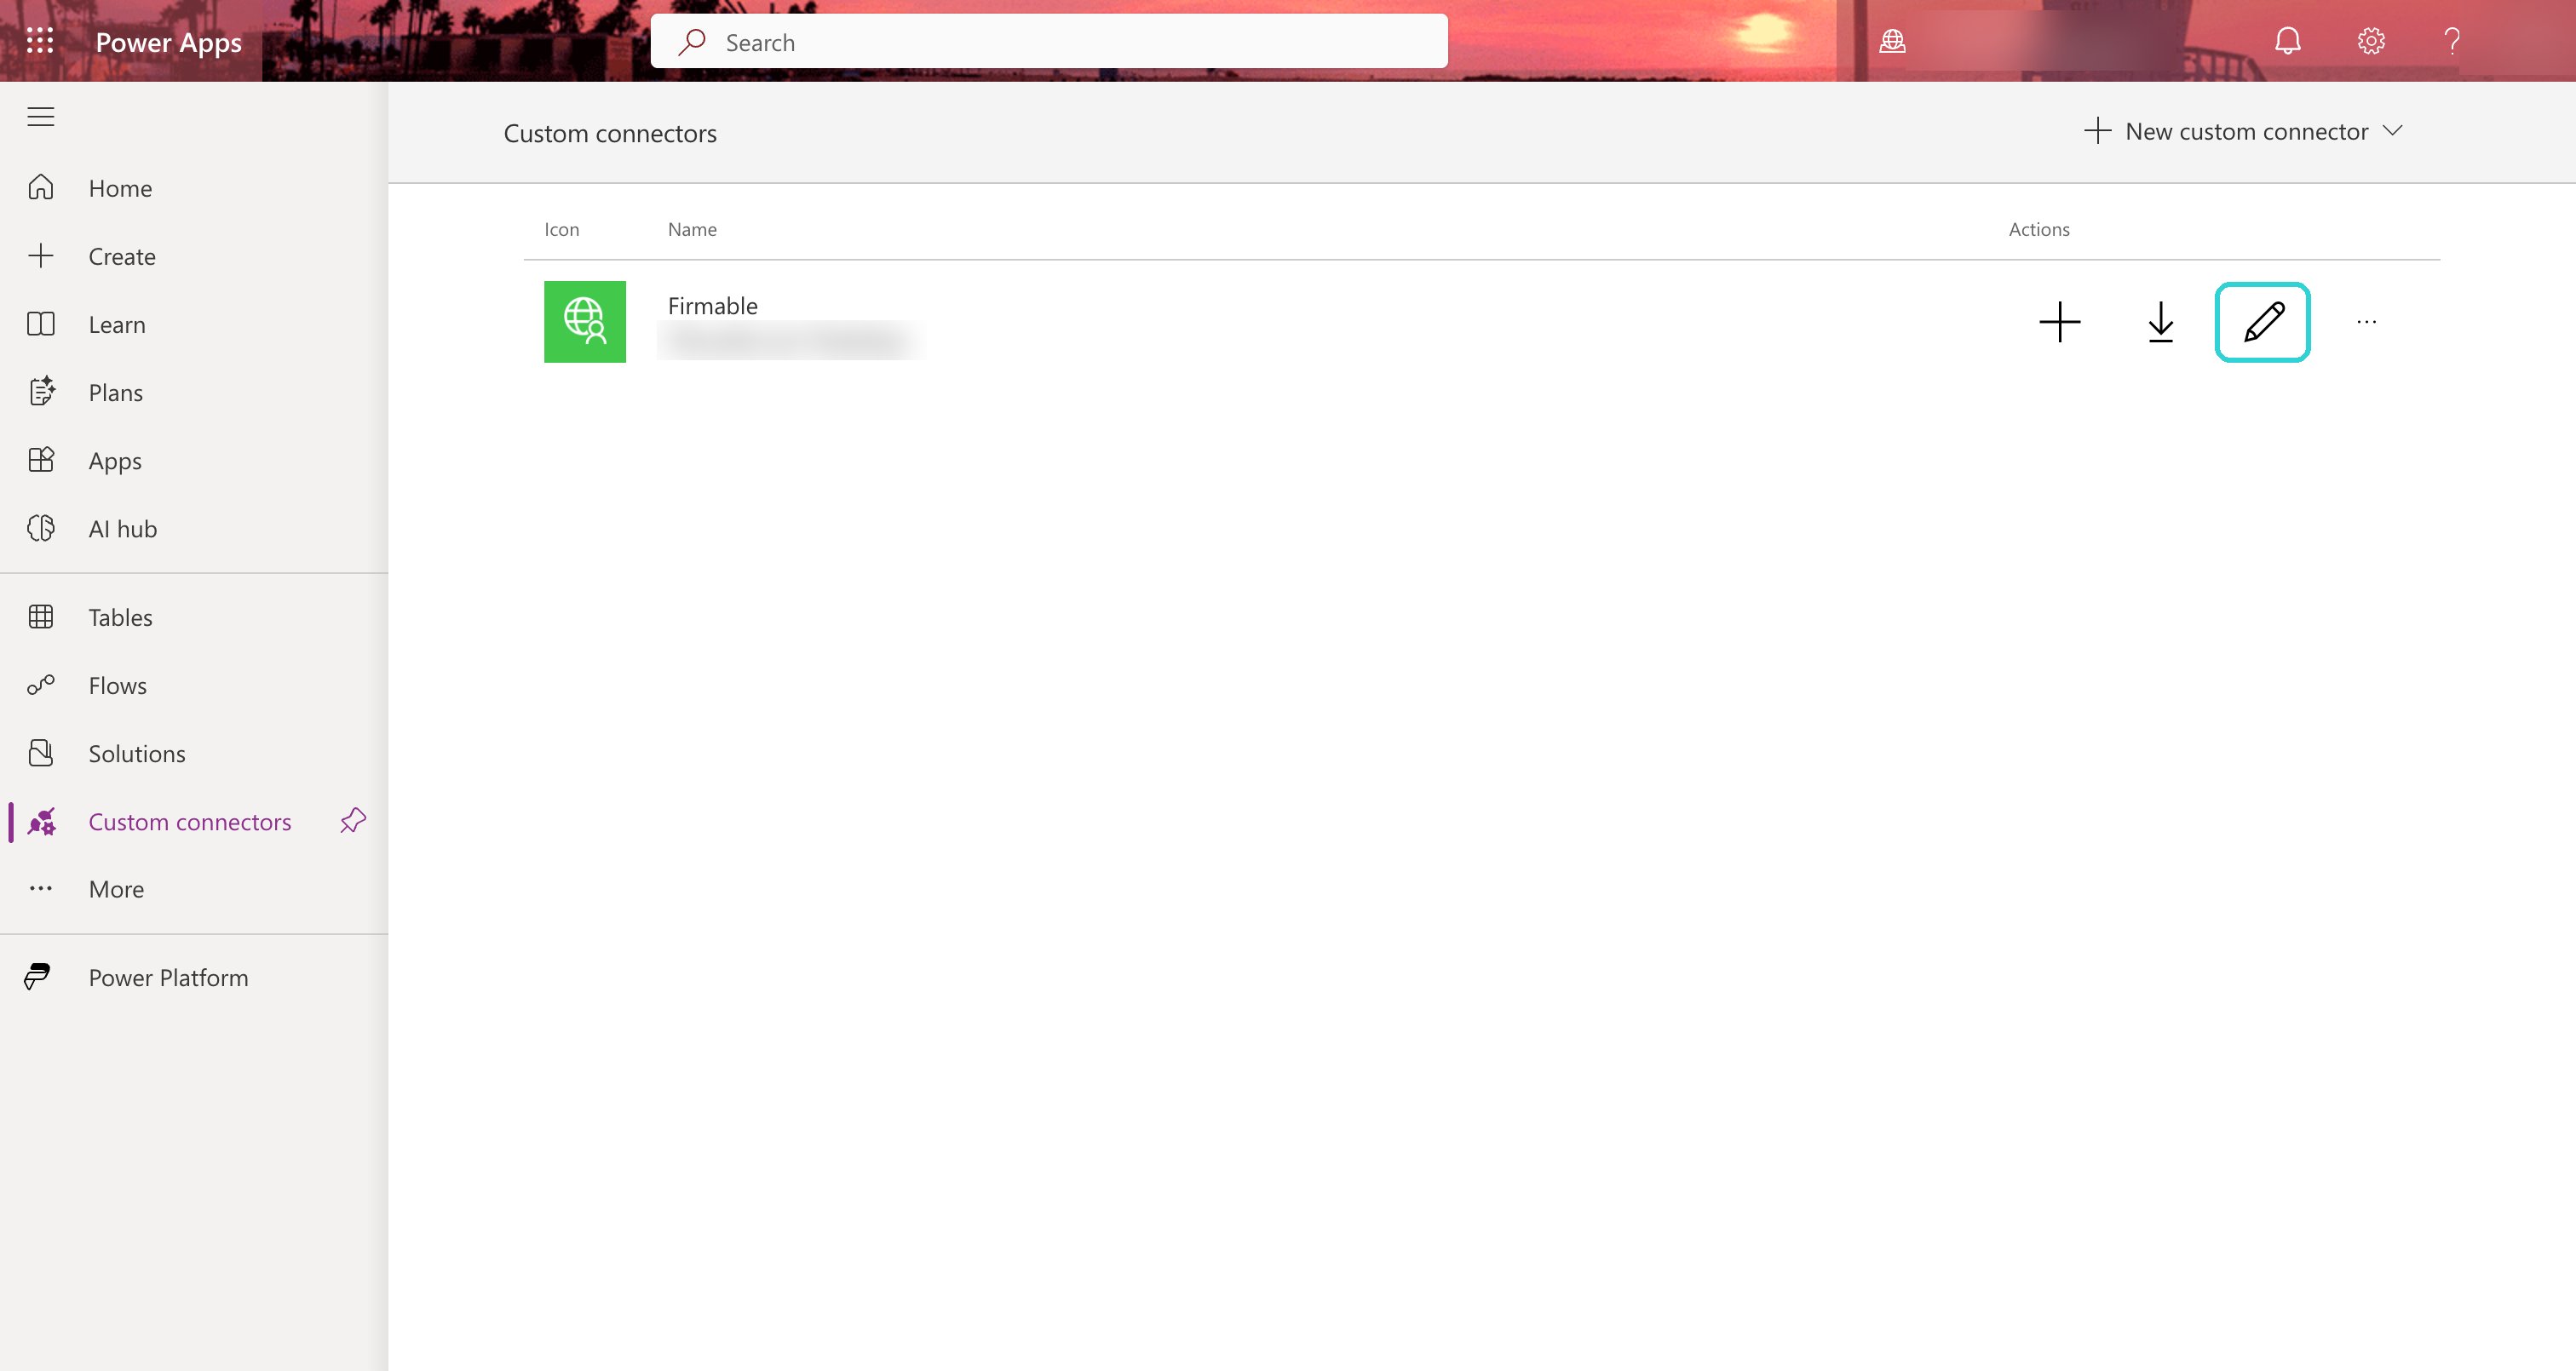
Go to **Custom connectors**, find yours in the list, and click the pencil (**Edit**) icon.
Three fields are left:
| Field | What to enter |
| ----------------- | ----------------------------------------- |
| **Client ID** | From the email we sent you |
| **Client secret** | From the email we sent you |
| **Refresh URL** | The same value as the **Token URL** above |
Leave **Scope** empty, then click **Create connector**.
## Step 3: Send us your Redirect URL
Don't skip this step — sign-in won't work until we've allow-listed your Redirect URL.
Power Apps generates a **Redirect URL** that's unique to your connector, and it only appears after
you've saved for the first time.
Go to **Custom connectors**, find yours in the list, and click the pencil (**Edit**) icon.
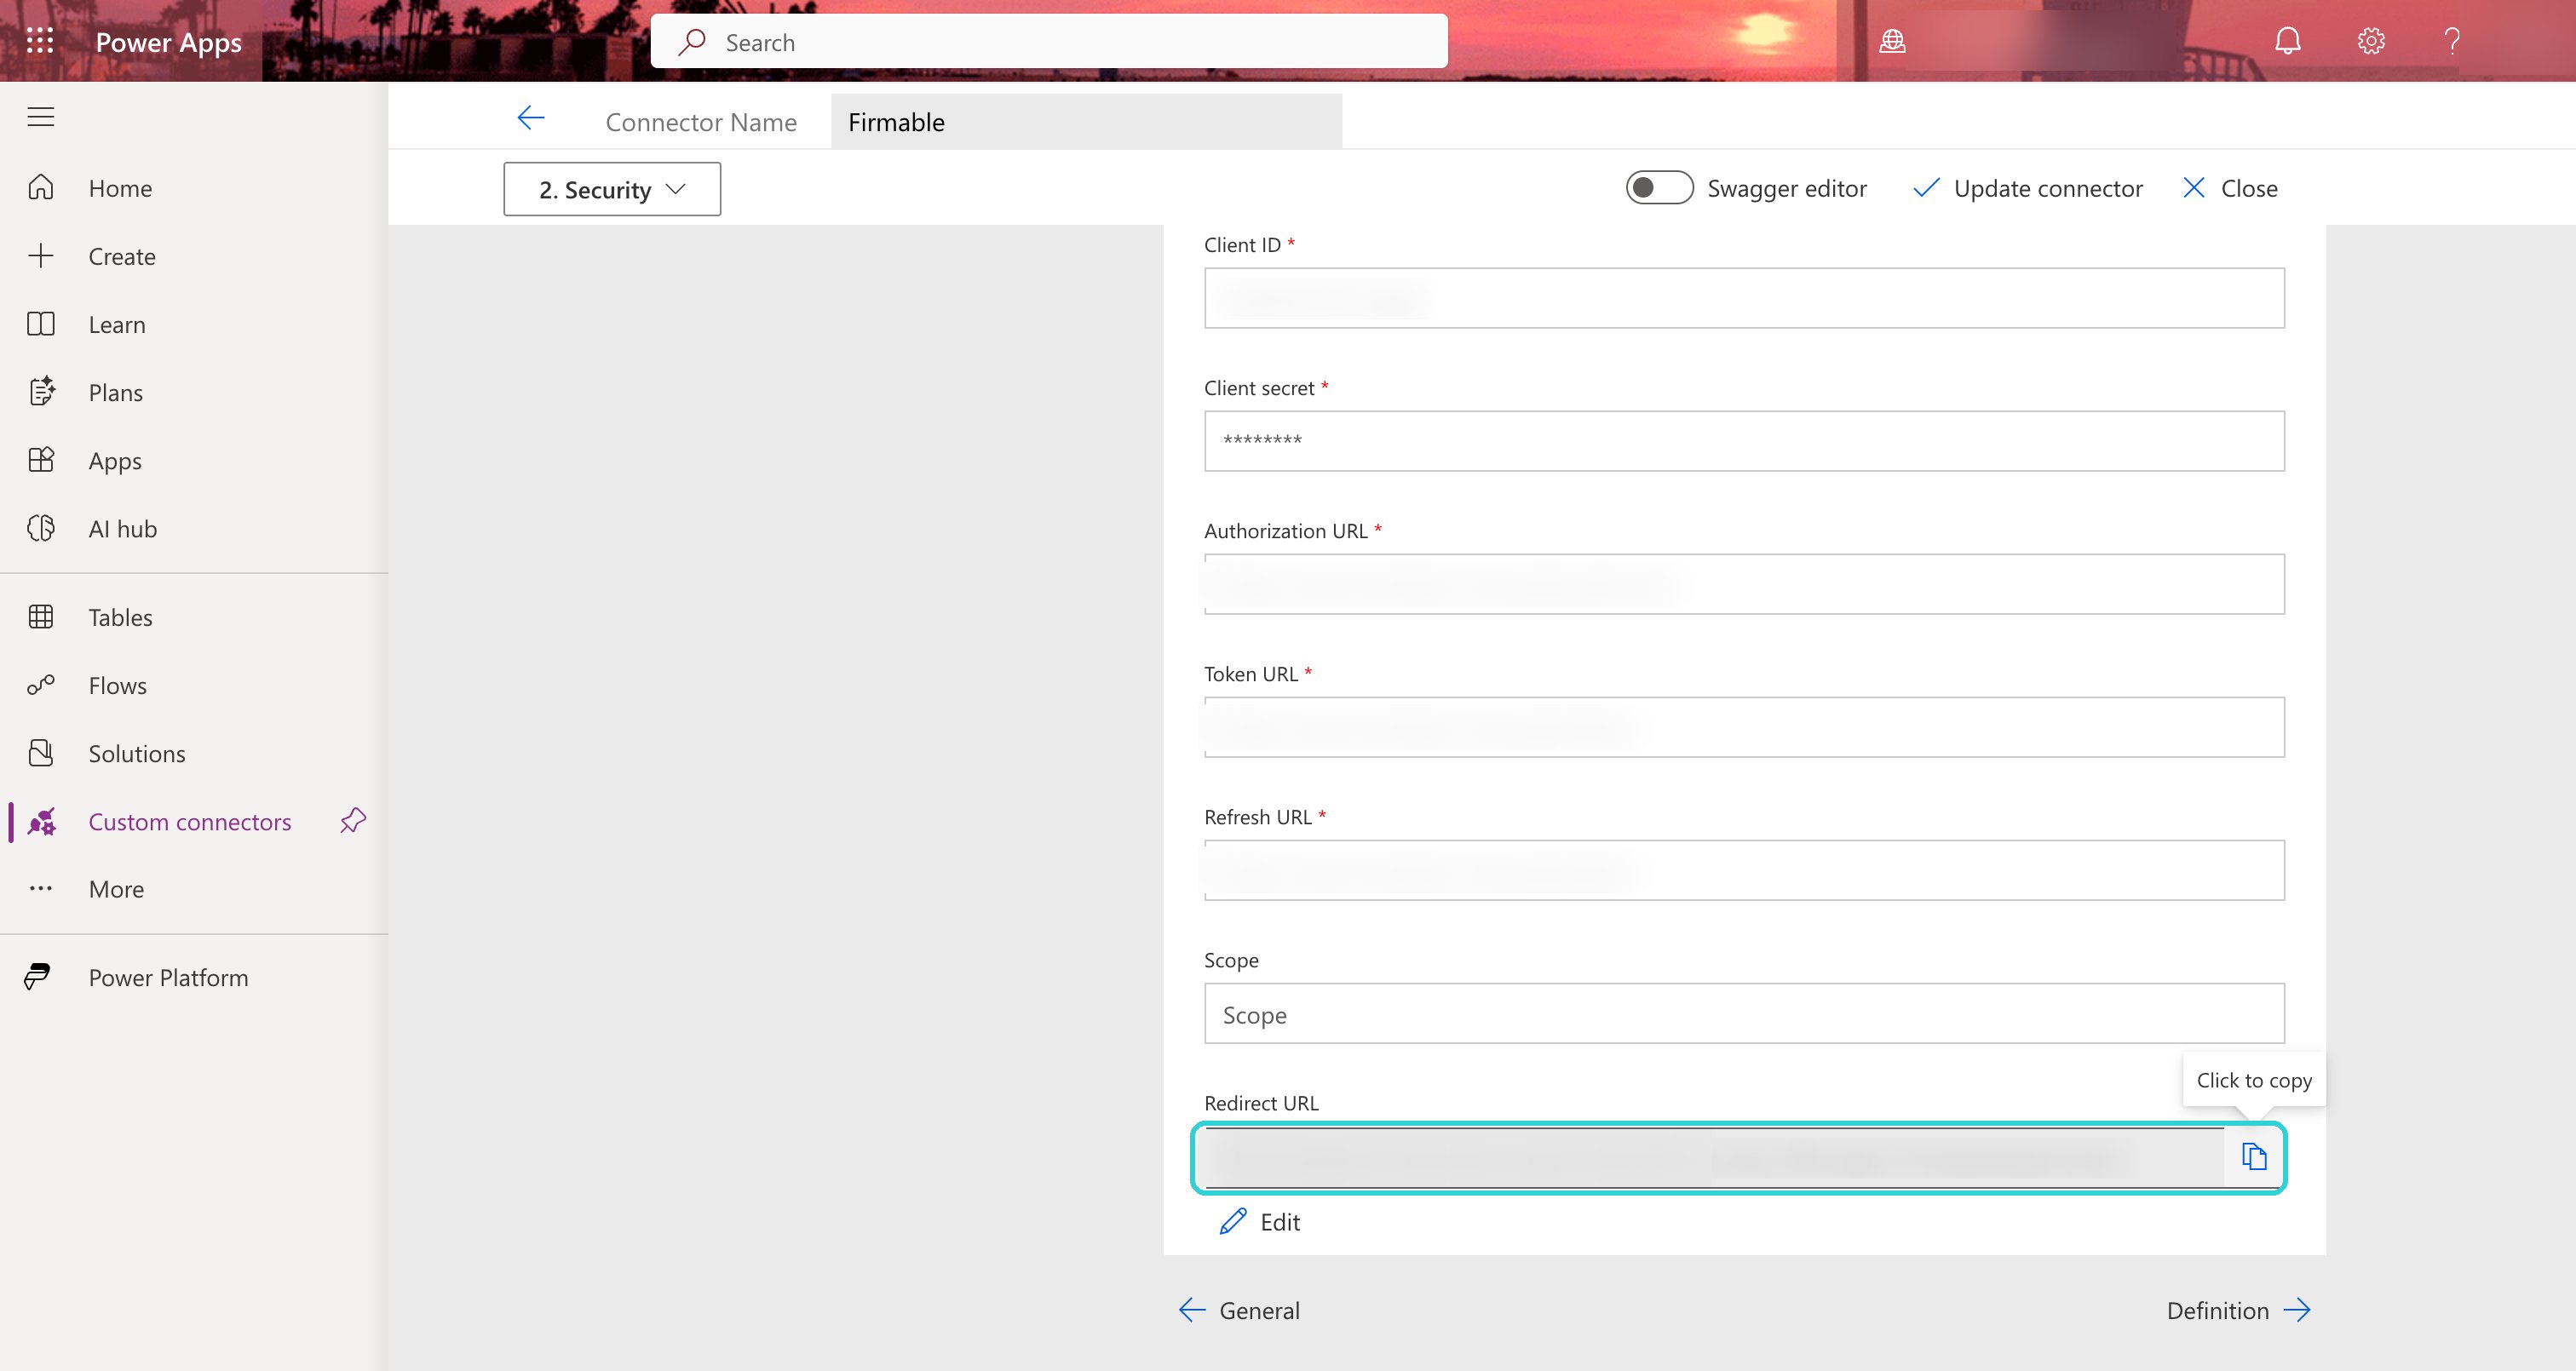
 Open the **Security** section. The **Redirect URL** is at the bottom — use the copy button beside
it.
Open the **Security** section. The **Redirect URL** is at the bottom — use the copy button beside
it.
 Send it to us using **Support** at the top of this page, and wait for us to confirm. It's a
quick change on our side.
## Step 4: Add it to an agent
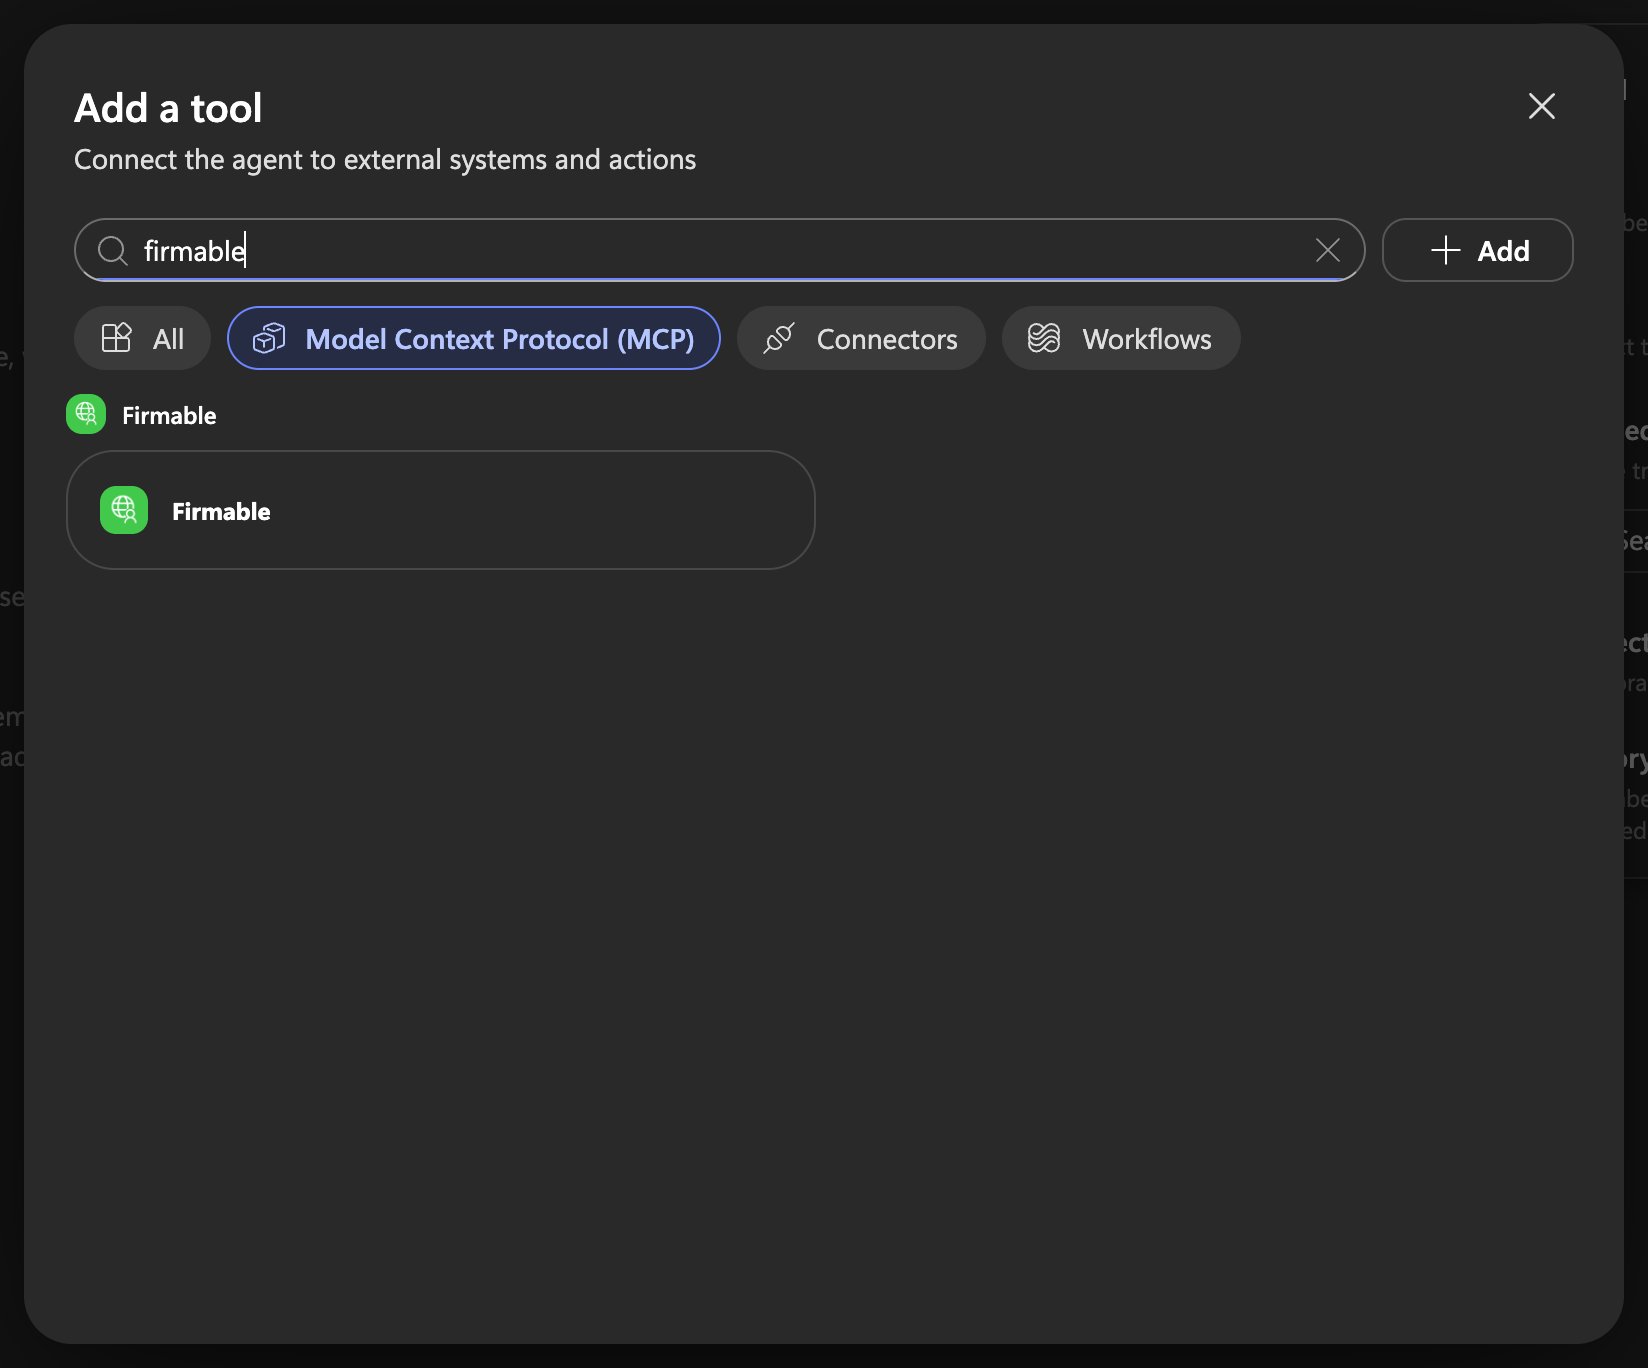
MCP tools only run inside an agent, so this last step happens in Copilot Studio rather than Power
Apps. Open the agent you want to use Firmable in, go to **Add a tool** → **Model Context Protocol
(MCP)**, and pick your connector from the list.
Send it to us using **Support** at the top of this page, and wait for us to confirm. It's a
quick change on our side.
## Step 4: Add it to an agent
MCP tools only run inside an agent, so this last step happens in Copilot Studio rather than Power
Apps. Open the agent you want to use Firmable in, go to **Add a tool** → **Model Context Protocol
(MCP)**, and pick your connector from the list.
 Open the **Connection** dropdown and choose **Create new connection**.
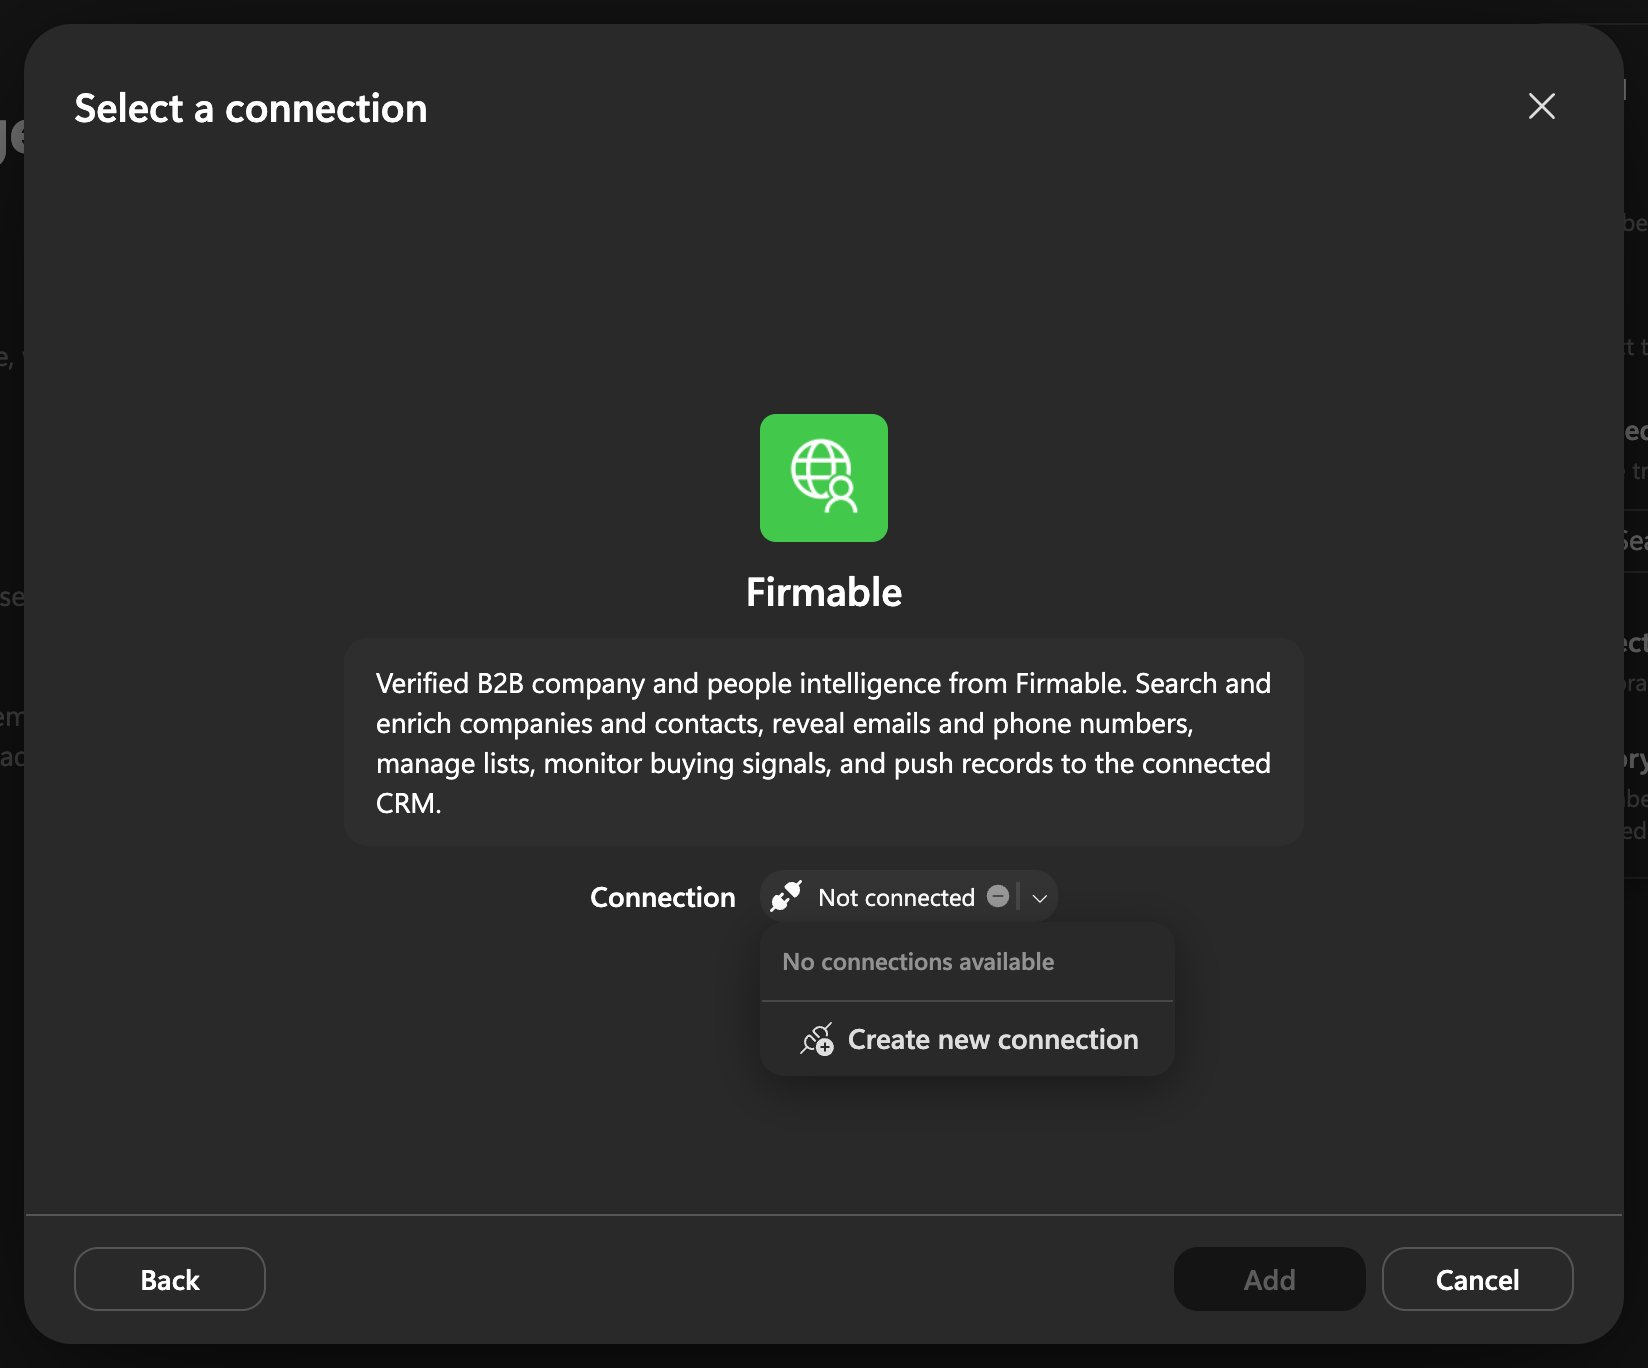 Give the connection a display name if you want one, then click **Create**.
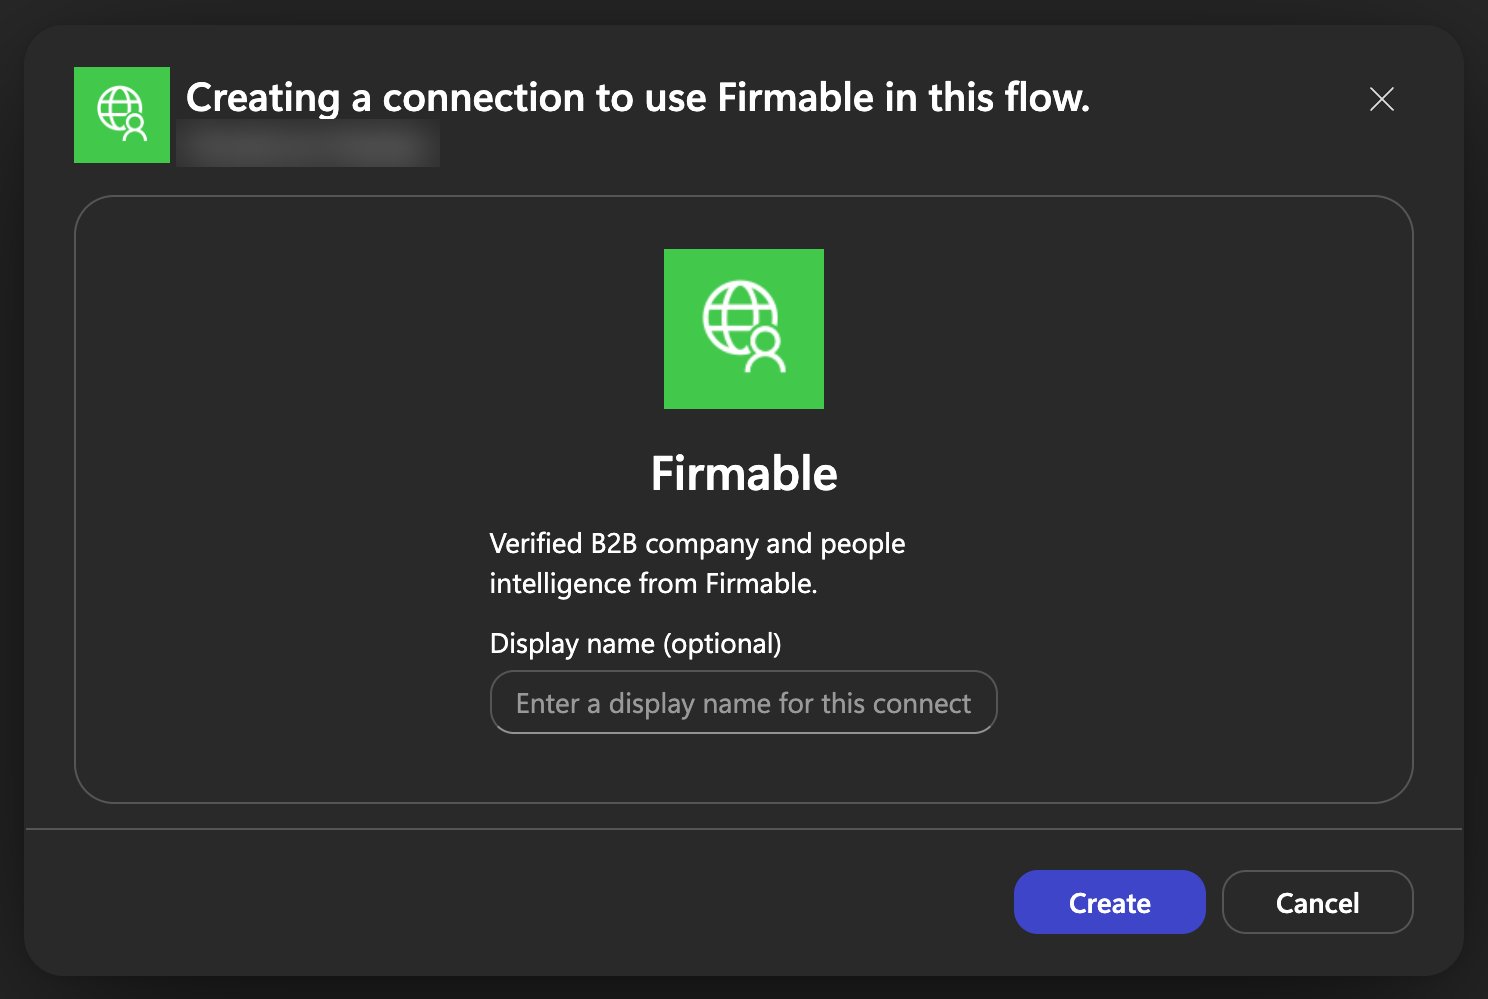 Sign in to Firmable and click **Allow**.
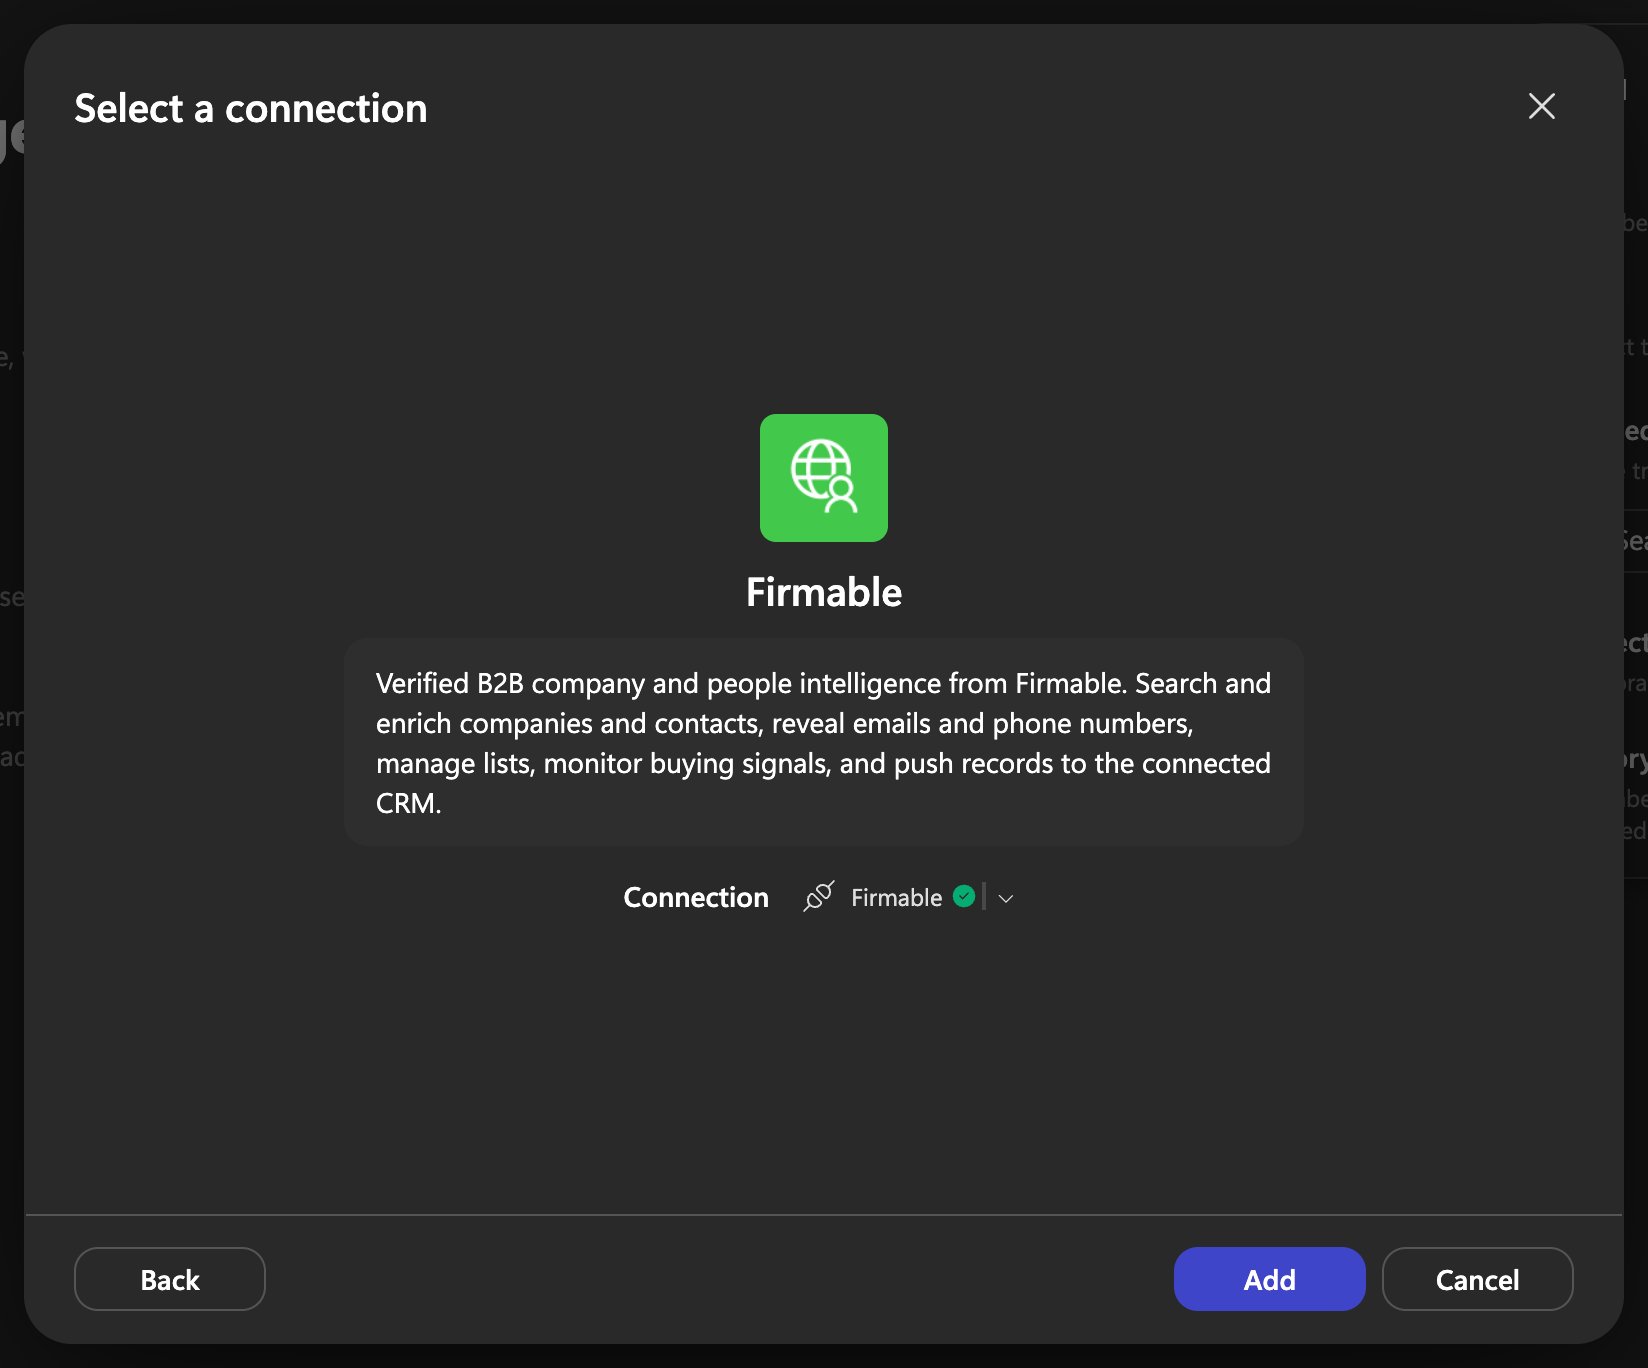
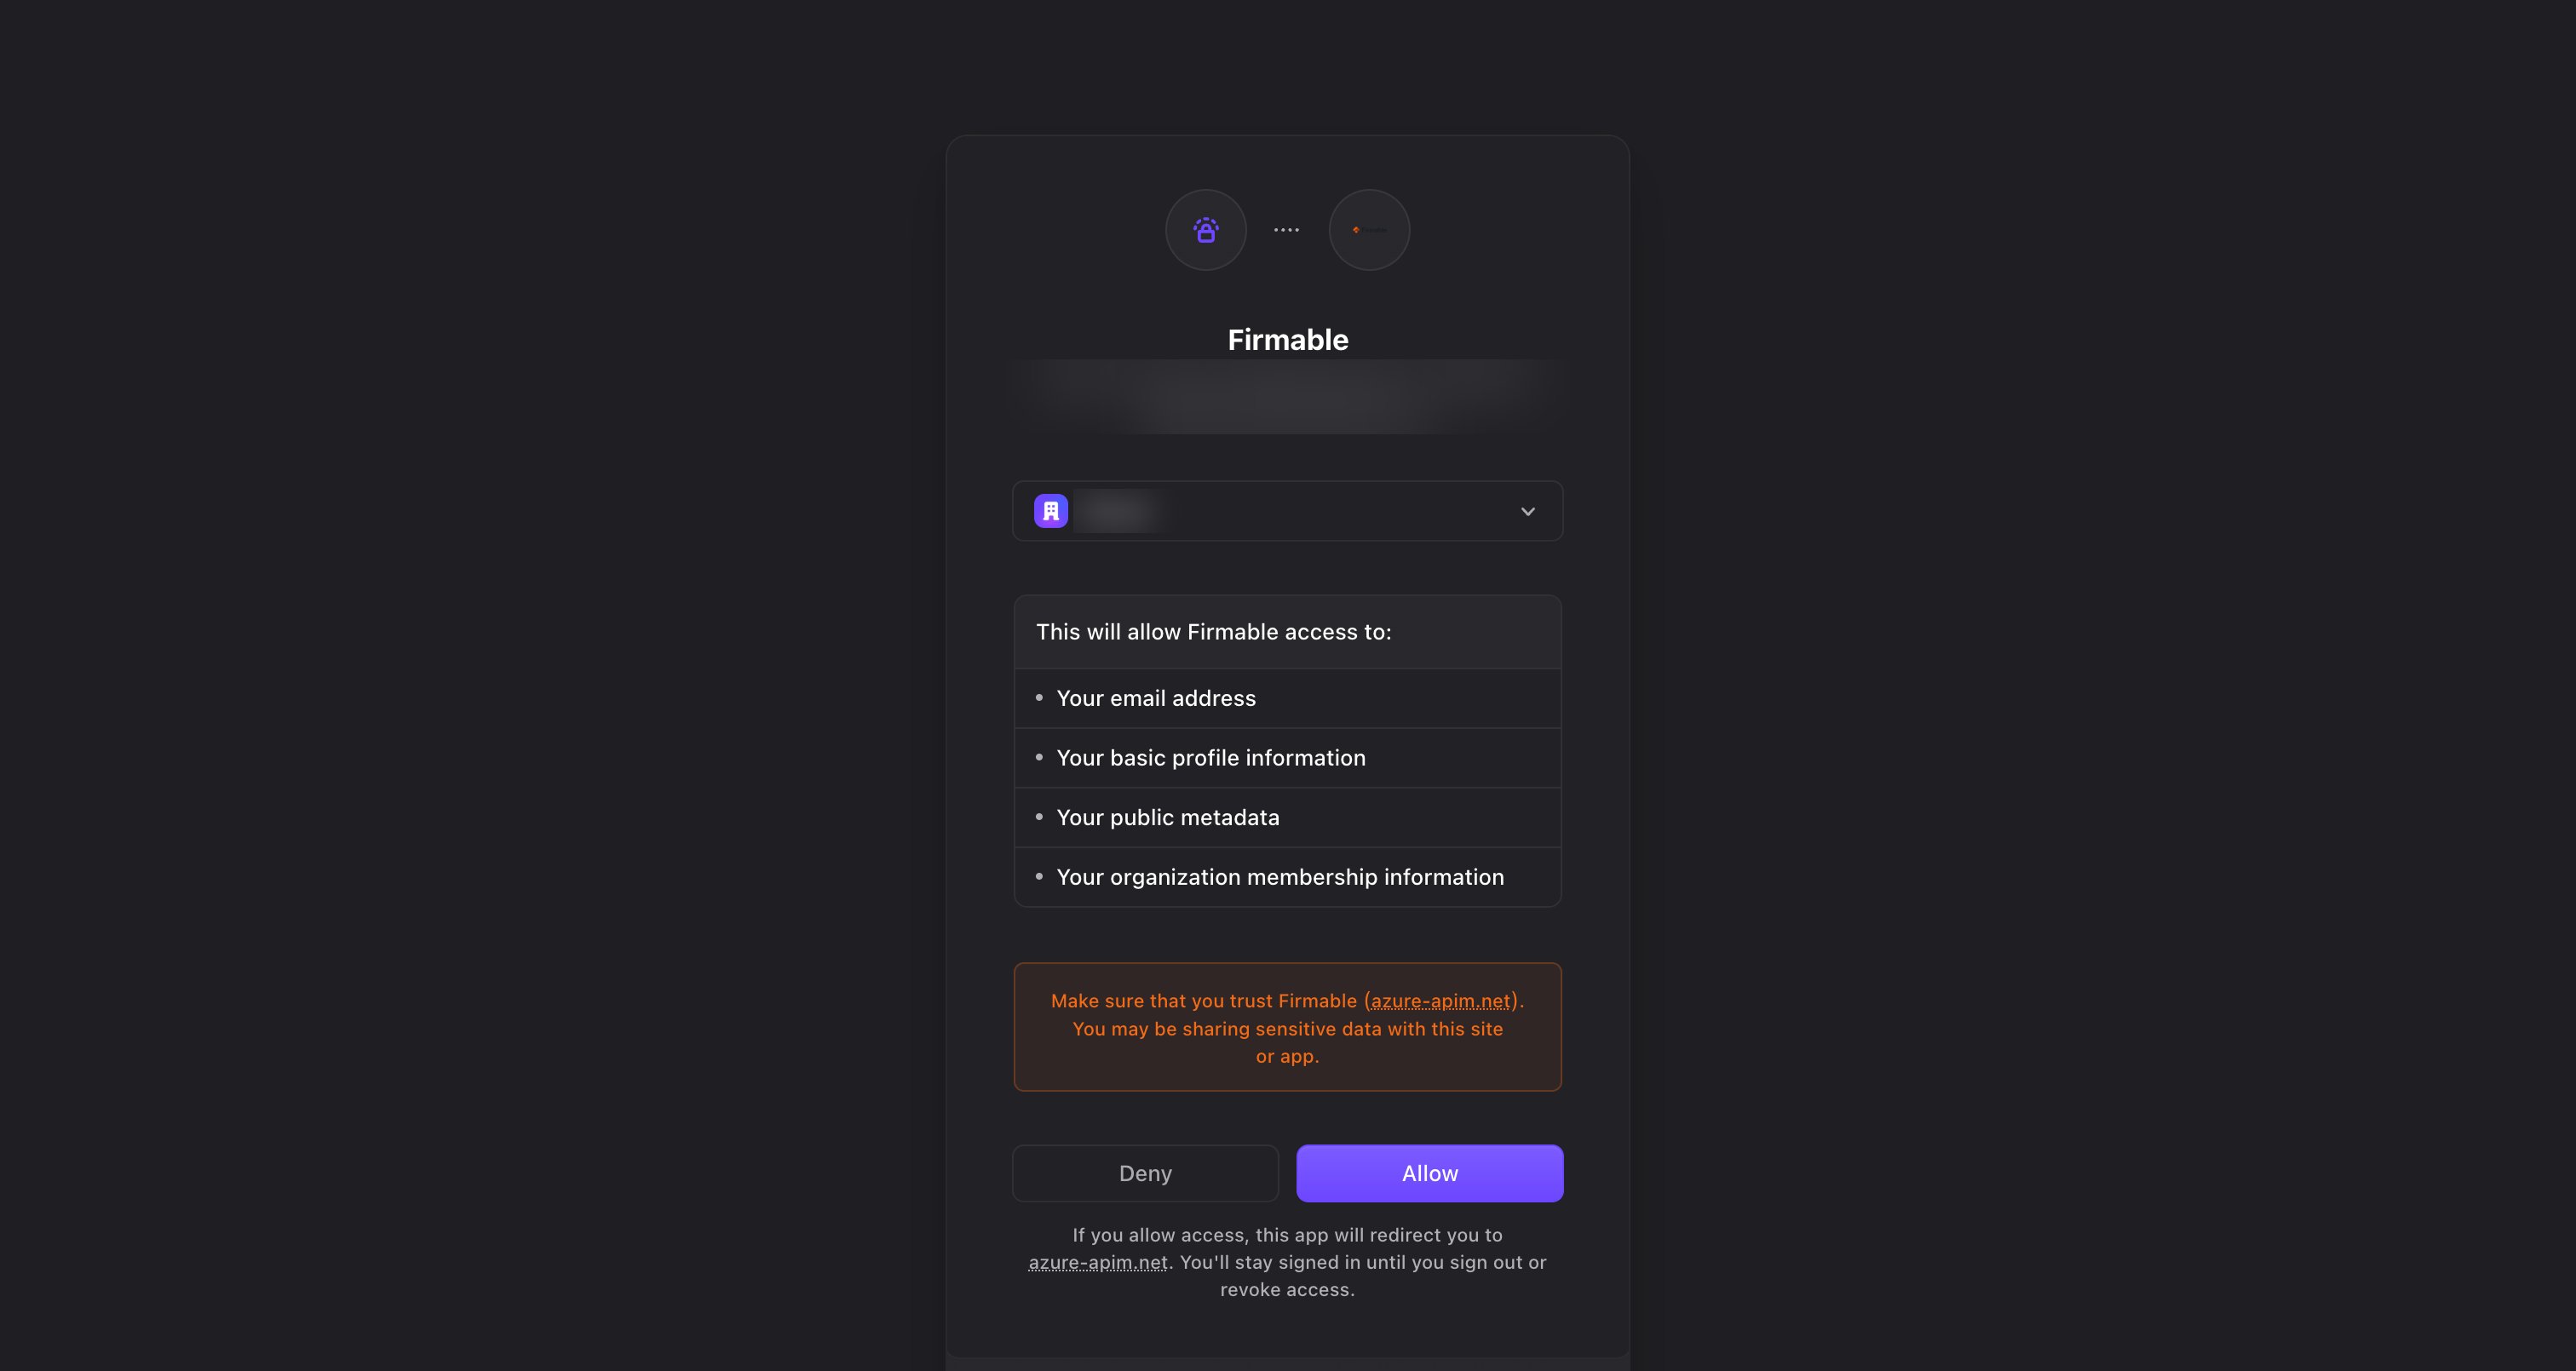 Back in Copilot Studio the connection shows a green tick and **Add** becomes available. Click
**Add**.
Back in Copilot Studio the connection shows a green tick and **Add** becomes available. Click
**Add**.
 Firmable is added to the agent as a tool. From here it's ordinary Copilot Studio work — test the
agent, then publish it wherever your team needs it.
Steps 1–3 are one-off. The connector stays available under **Model Context Protocol (MCP)** for any
agent in that environment to add.
Firmable is added to the agent as a tool. From here it's ordinary Copilot Studio work — test the
agent, then publish it wherever your team needs it.
Steps 1–3 are one-off. The connector stays available under **Model Context Protocol (MCP)** for any
agent in that environment to add.