Team and Enterprise plans: an owner adds the connector under Organization settings →
Connectors → Add, then hovers Custom and selects Web. Team members then connect to it
from Customize → Connectors by clicking Connect on the connector labelled Custom.
You’ll need the MCP URL and Client ID — see URL & Client ID.
Claude (Web)
1
Open Customize
In Claude, open the sidebar and click Customize.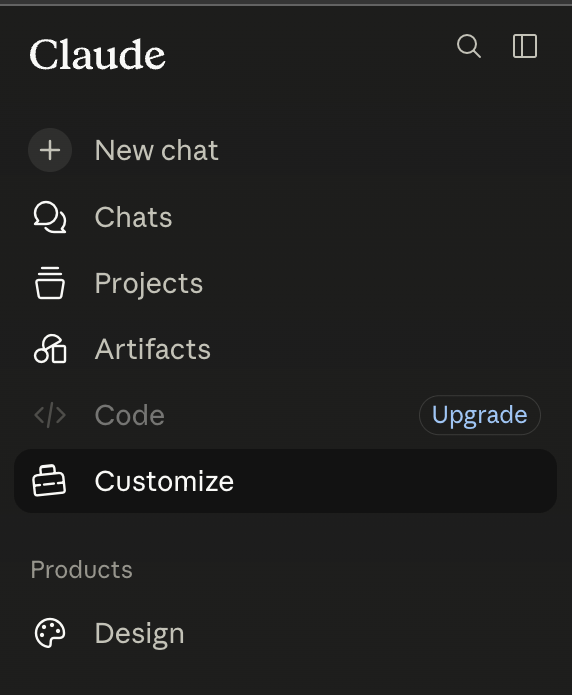
2
Add a custom connector
Go to the Connectors tab, click the +, and choose Add custom connector.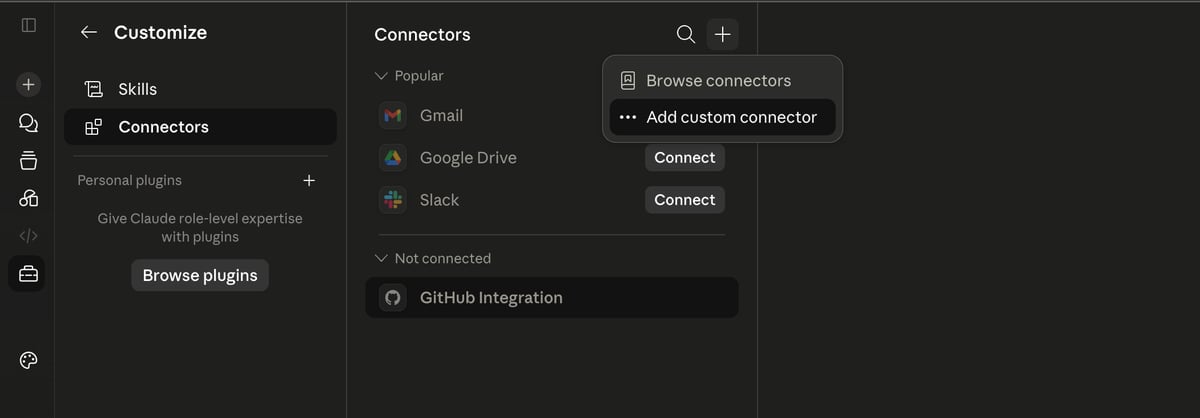
3
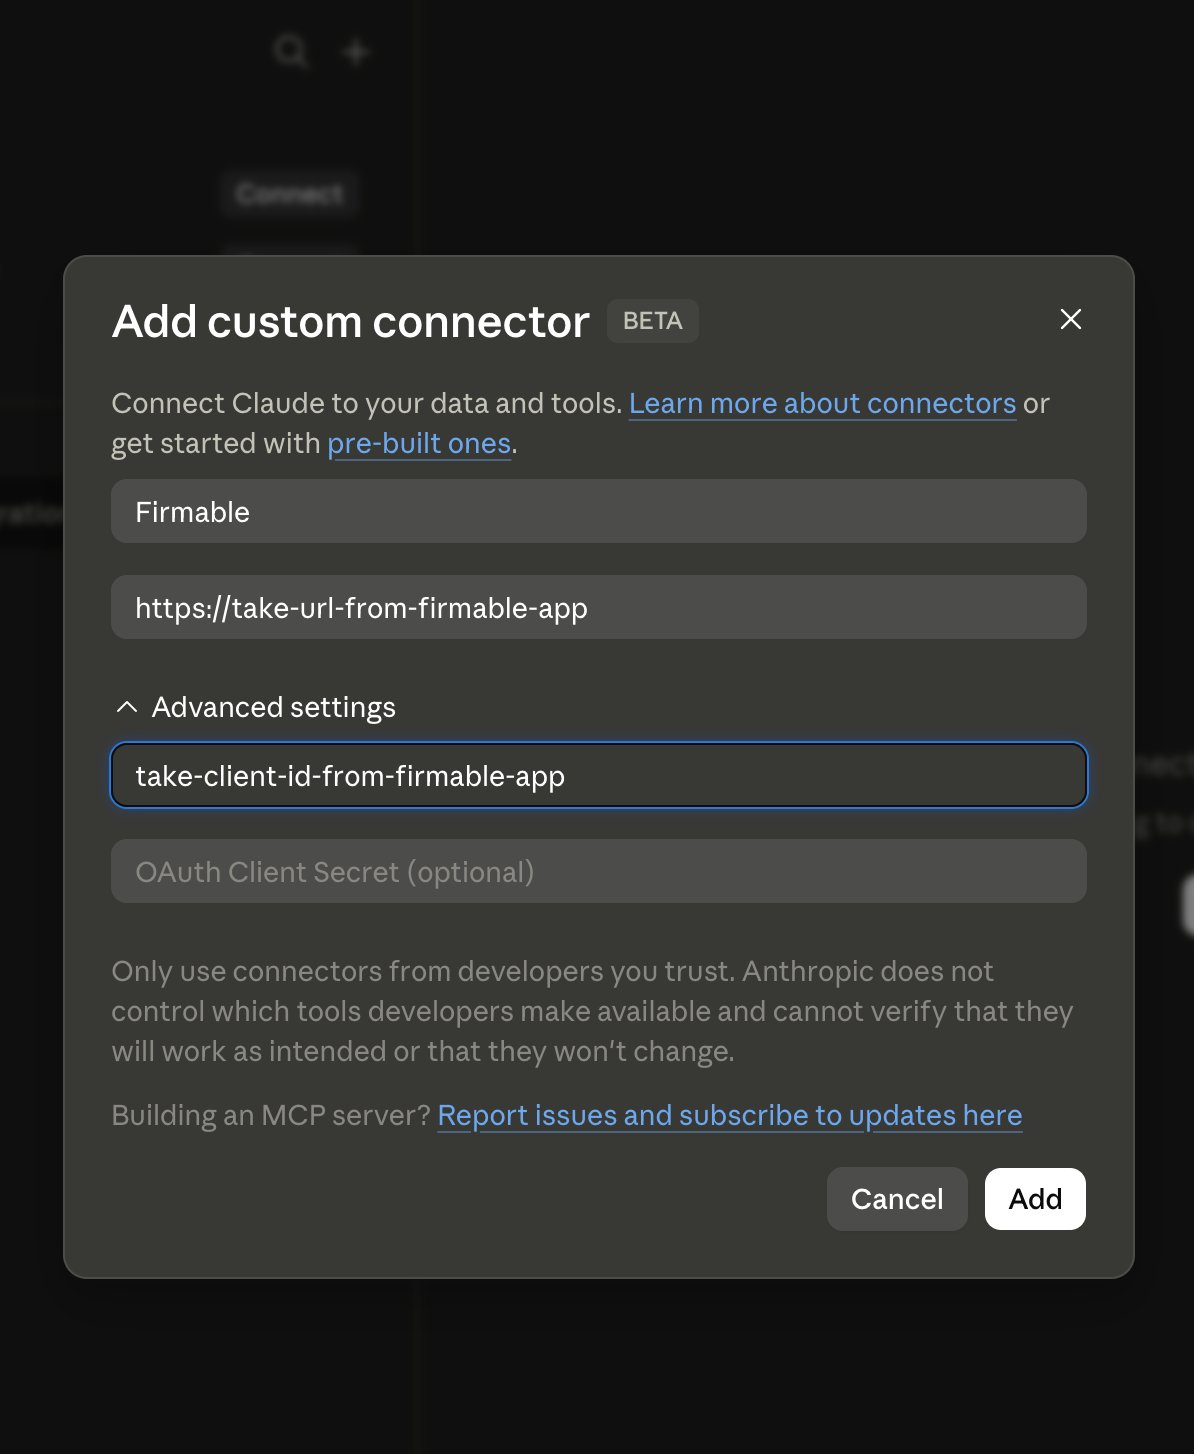
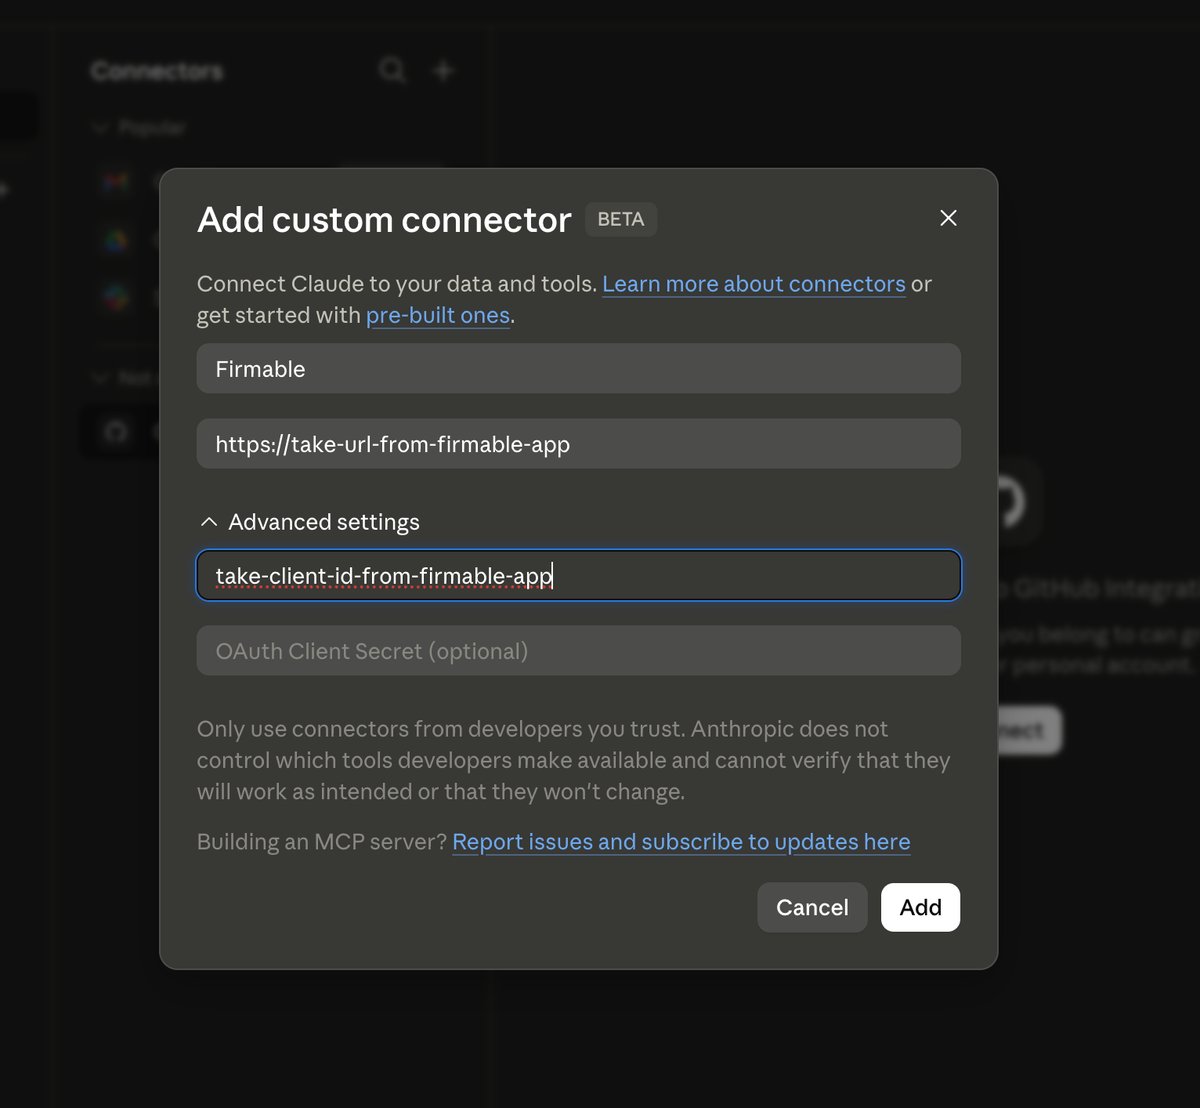
Enter the Firmable MCP details
- Name: anything you like — this guide uses
Firmable - Remote MCP server URL: the MCP URL
- Expand Advanced settings and enter your OAuth Client ID (your Firmable Client ID).
4
Connect
Firmable now appears under Not connected. Select it and click Connect.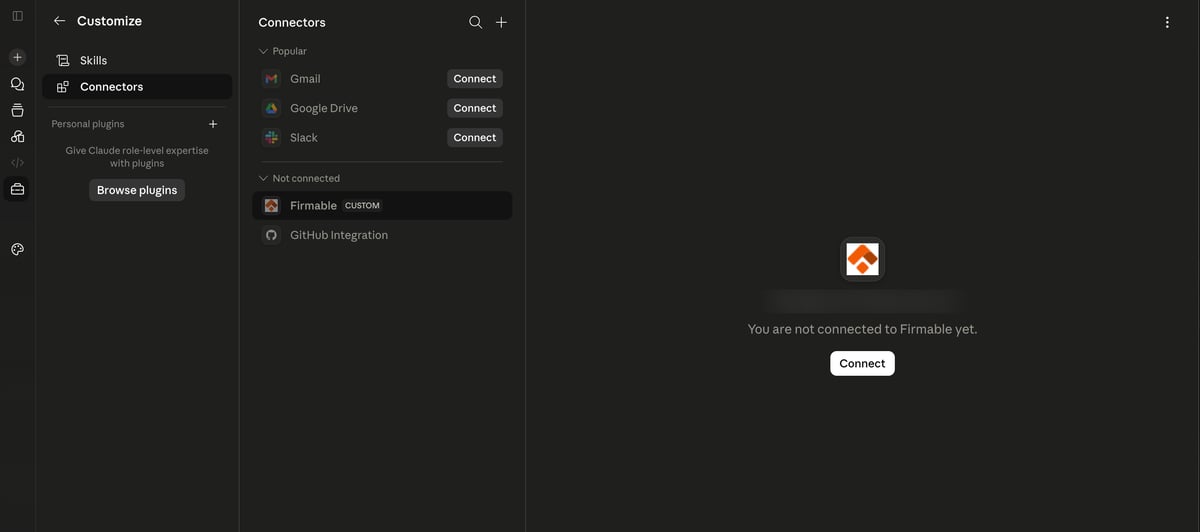
5
Authorize
Sign in to Firmable and click Allow to authorize the connection.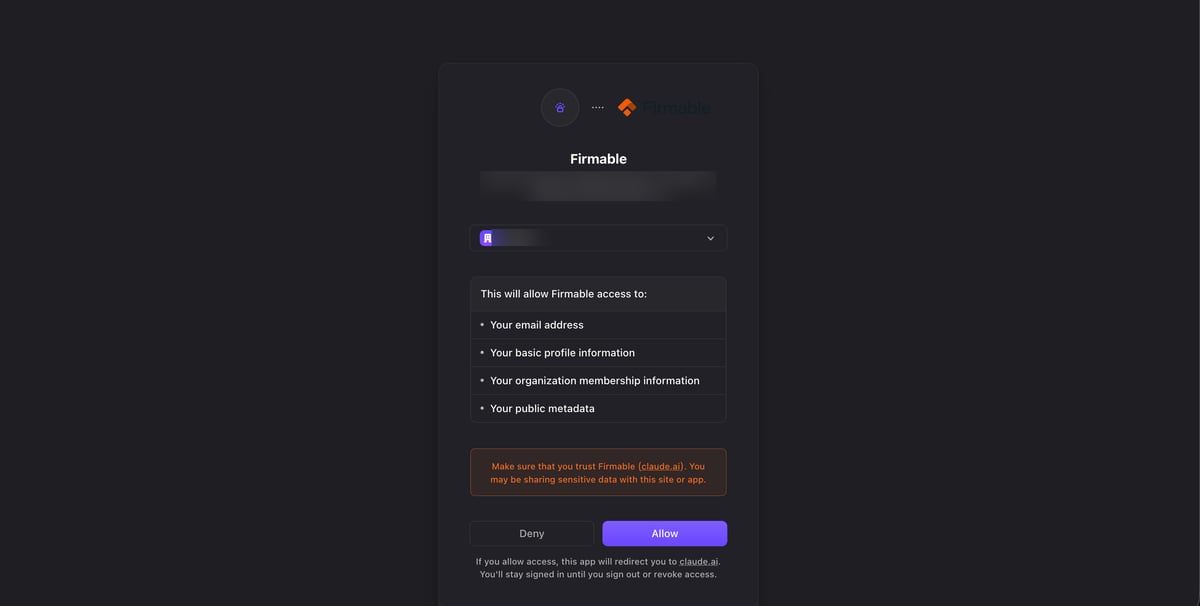
6
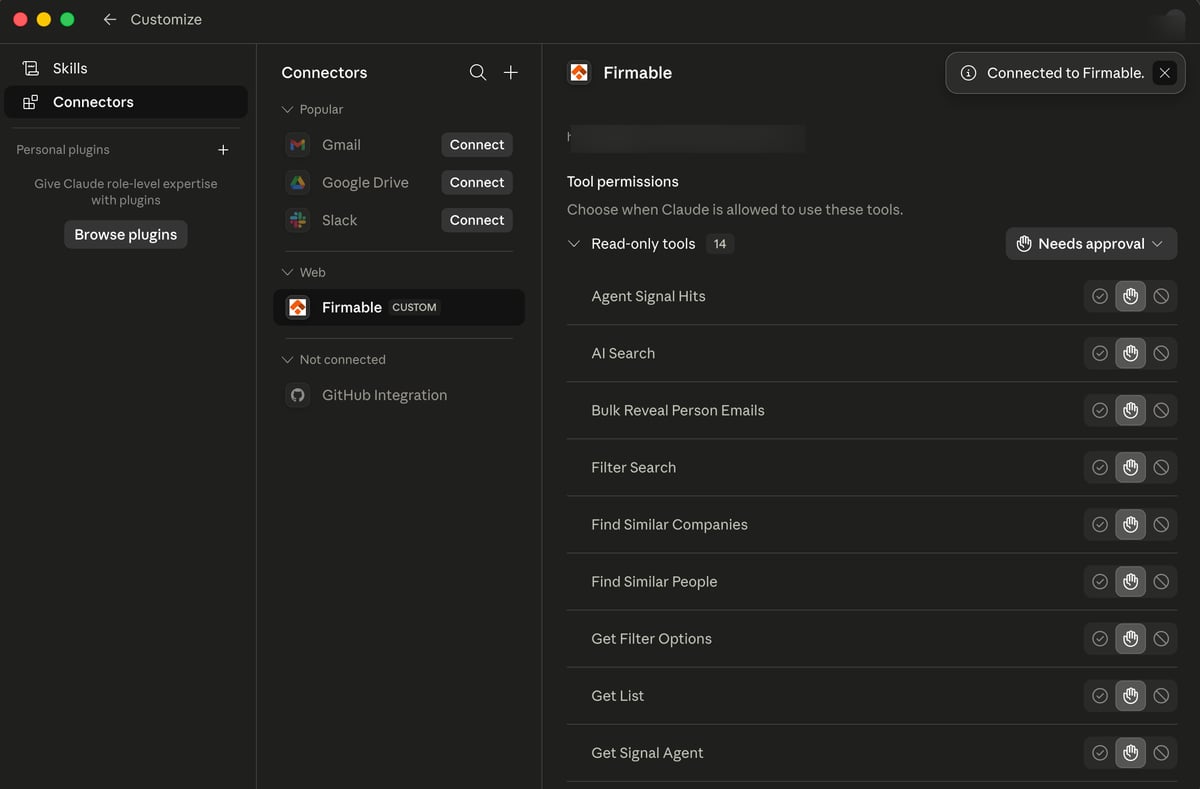
Review tool permissions
Once connected, choose when Claude is allowed to use each Firmable tool, then start using it in a chat.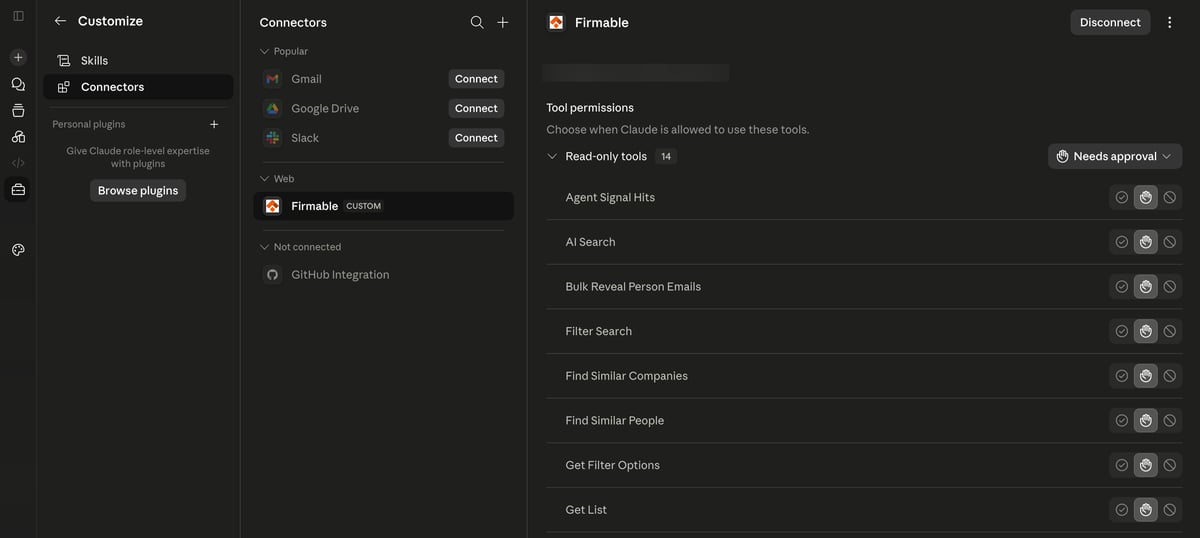
Claude (Desktop)
Custom connectors are brokered through your Claude account. If you already added Firmable on the
web, it appears in Claude (Desktop) automatically — just open Customize → Connectors and click
Connect (jump to step 4). If you haven’t, add it from scratch below.
1
Open Customize
In Claude (Desktop), open the sidebar and click Customize.
2
Add a custom connector
Go to the Connectors tab, click the +, and choose Add custom connector.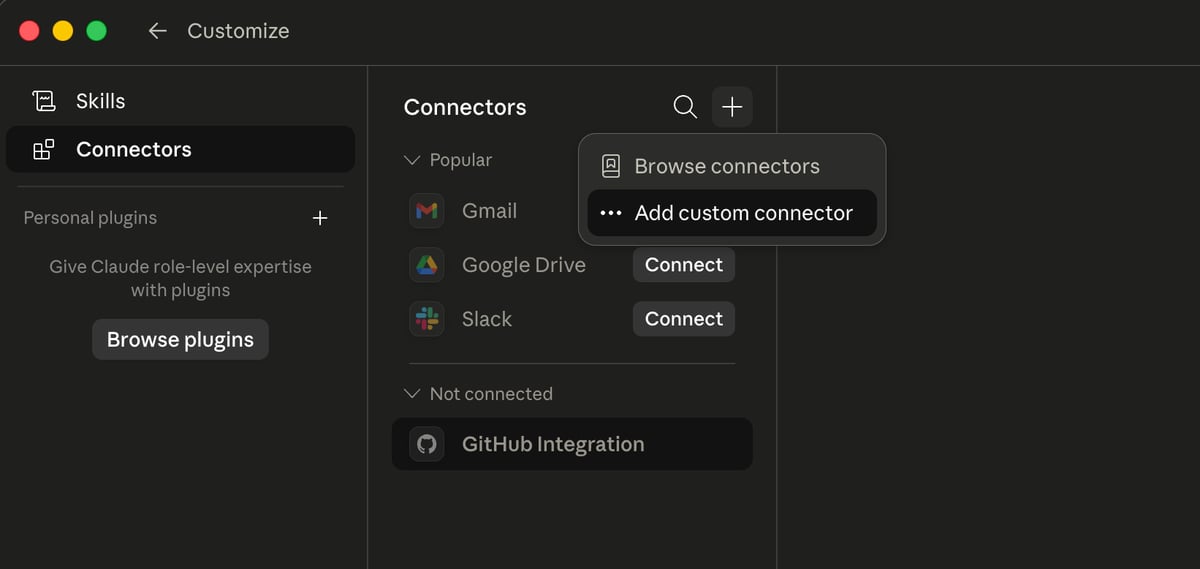
3
Enter the Firmable MCP details
- Name: anything you like — this guide uses
Firmable - Remote MCP server URL: the MCP URL
- Expand Advanced settings and enter your OAuth Client ID.
4
Connect
Firmable appears under Not connected. Select it and click Connect.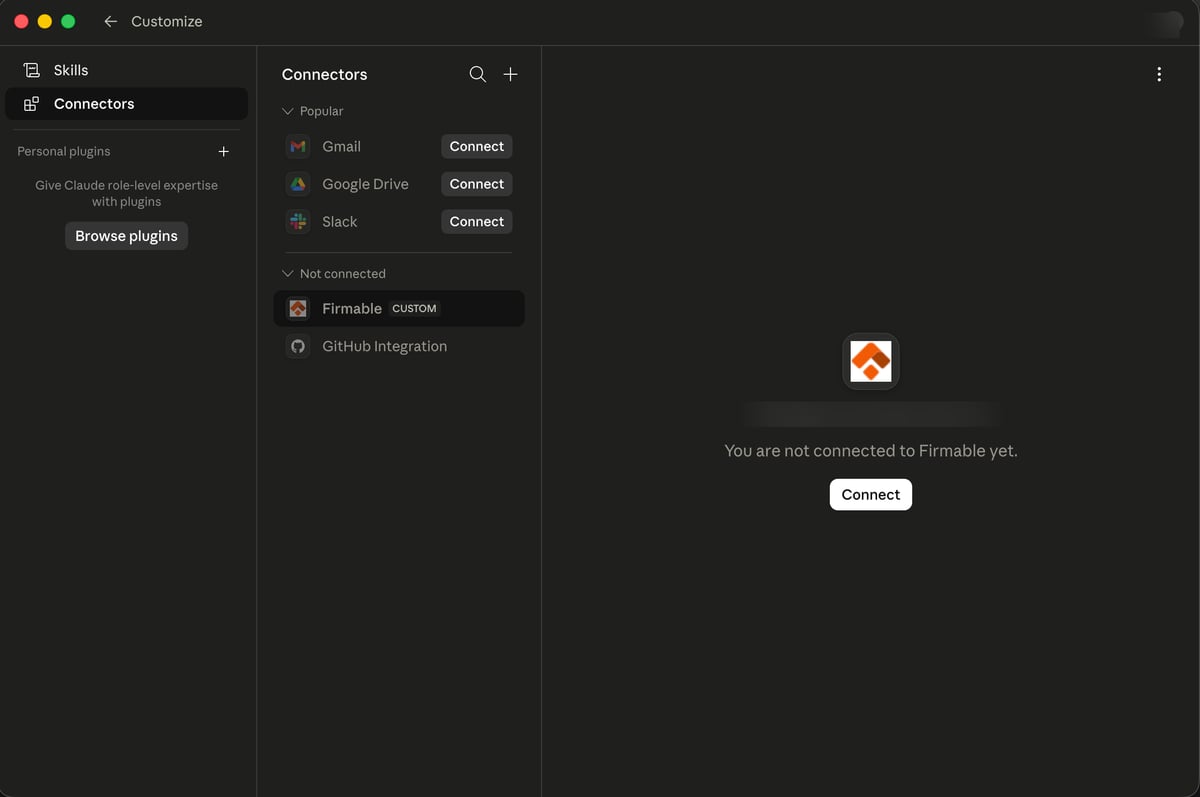
5
Authorize
Claude opens your browser to authorize. Sign in to Firmable and click Allow.
6
Review tool permissions
Back in Claude (Desktop), Firmable shows as Connected. Choose when Claude is allowed to use each
tool, then start using it in a chat.